

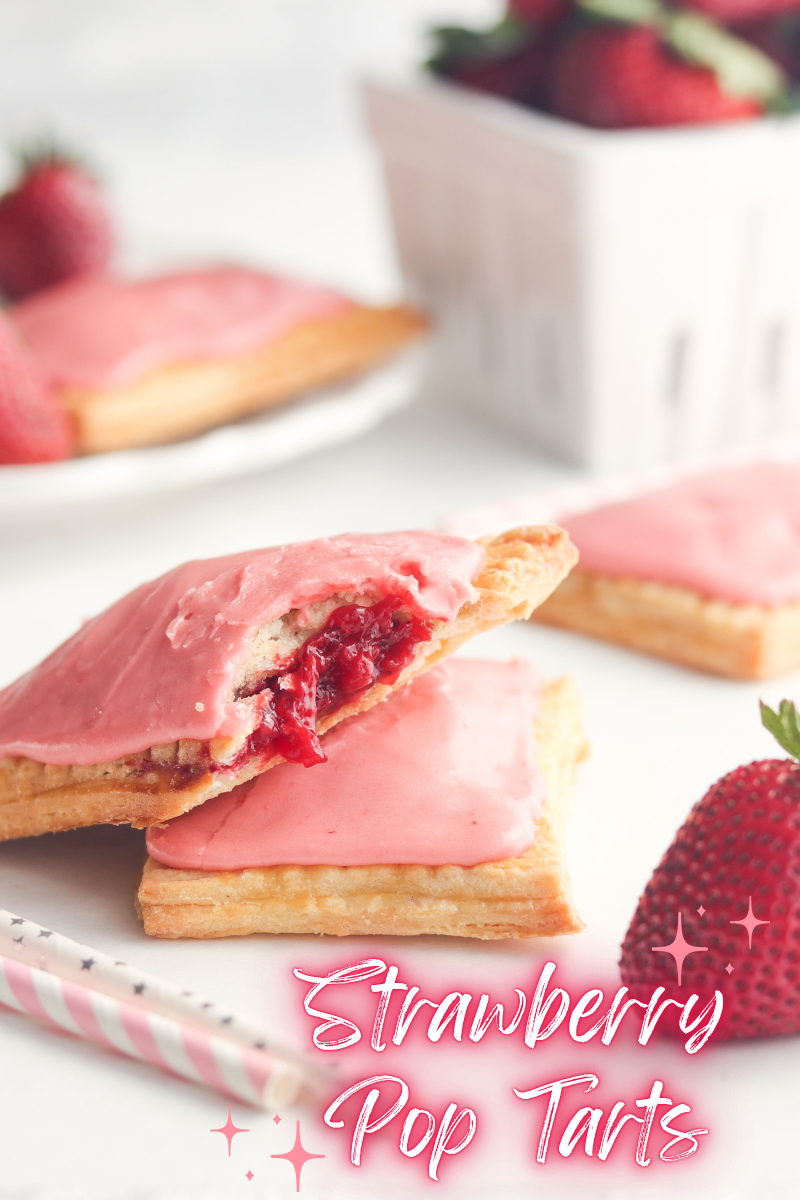
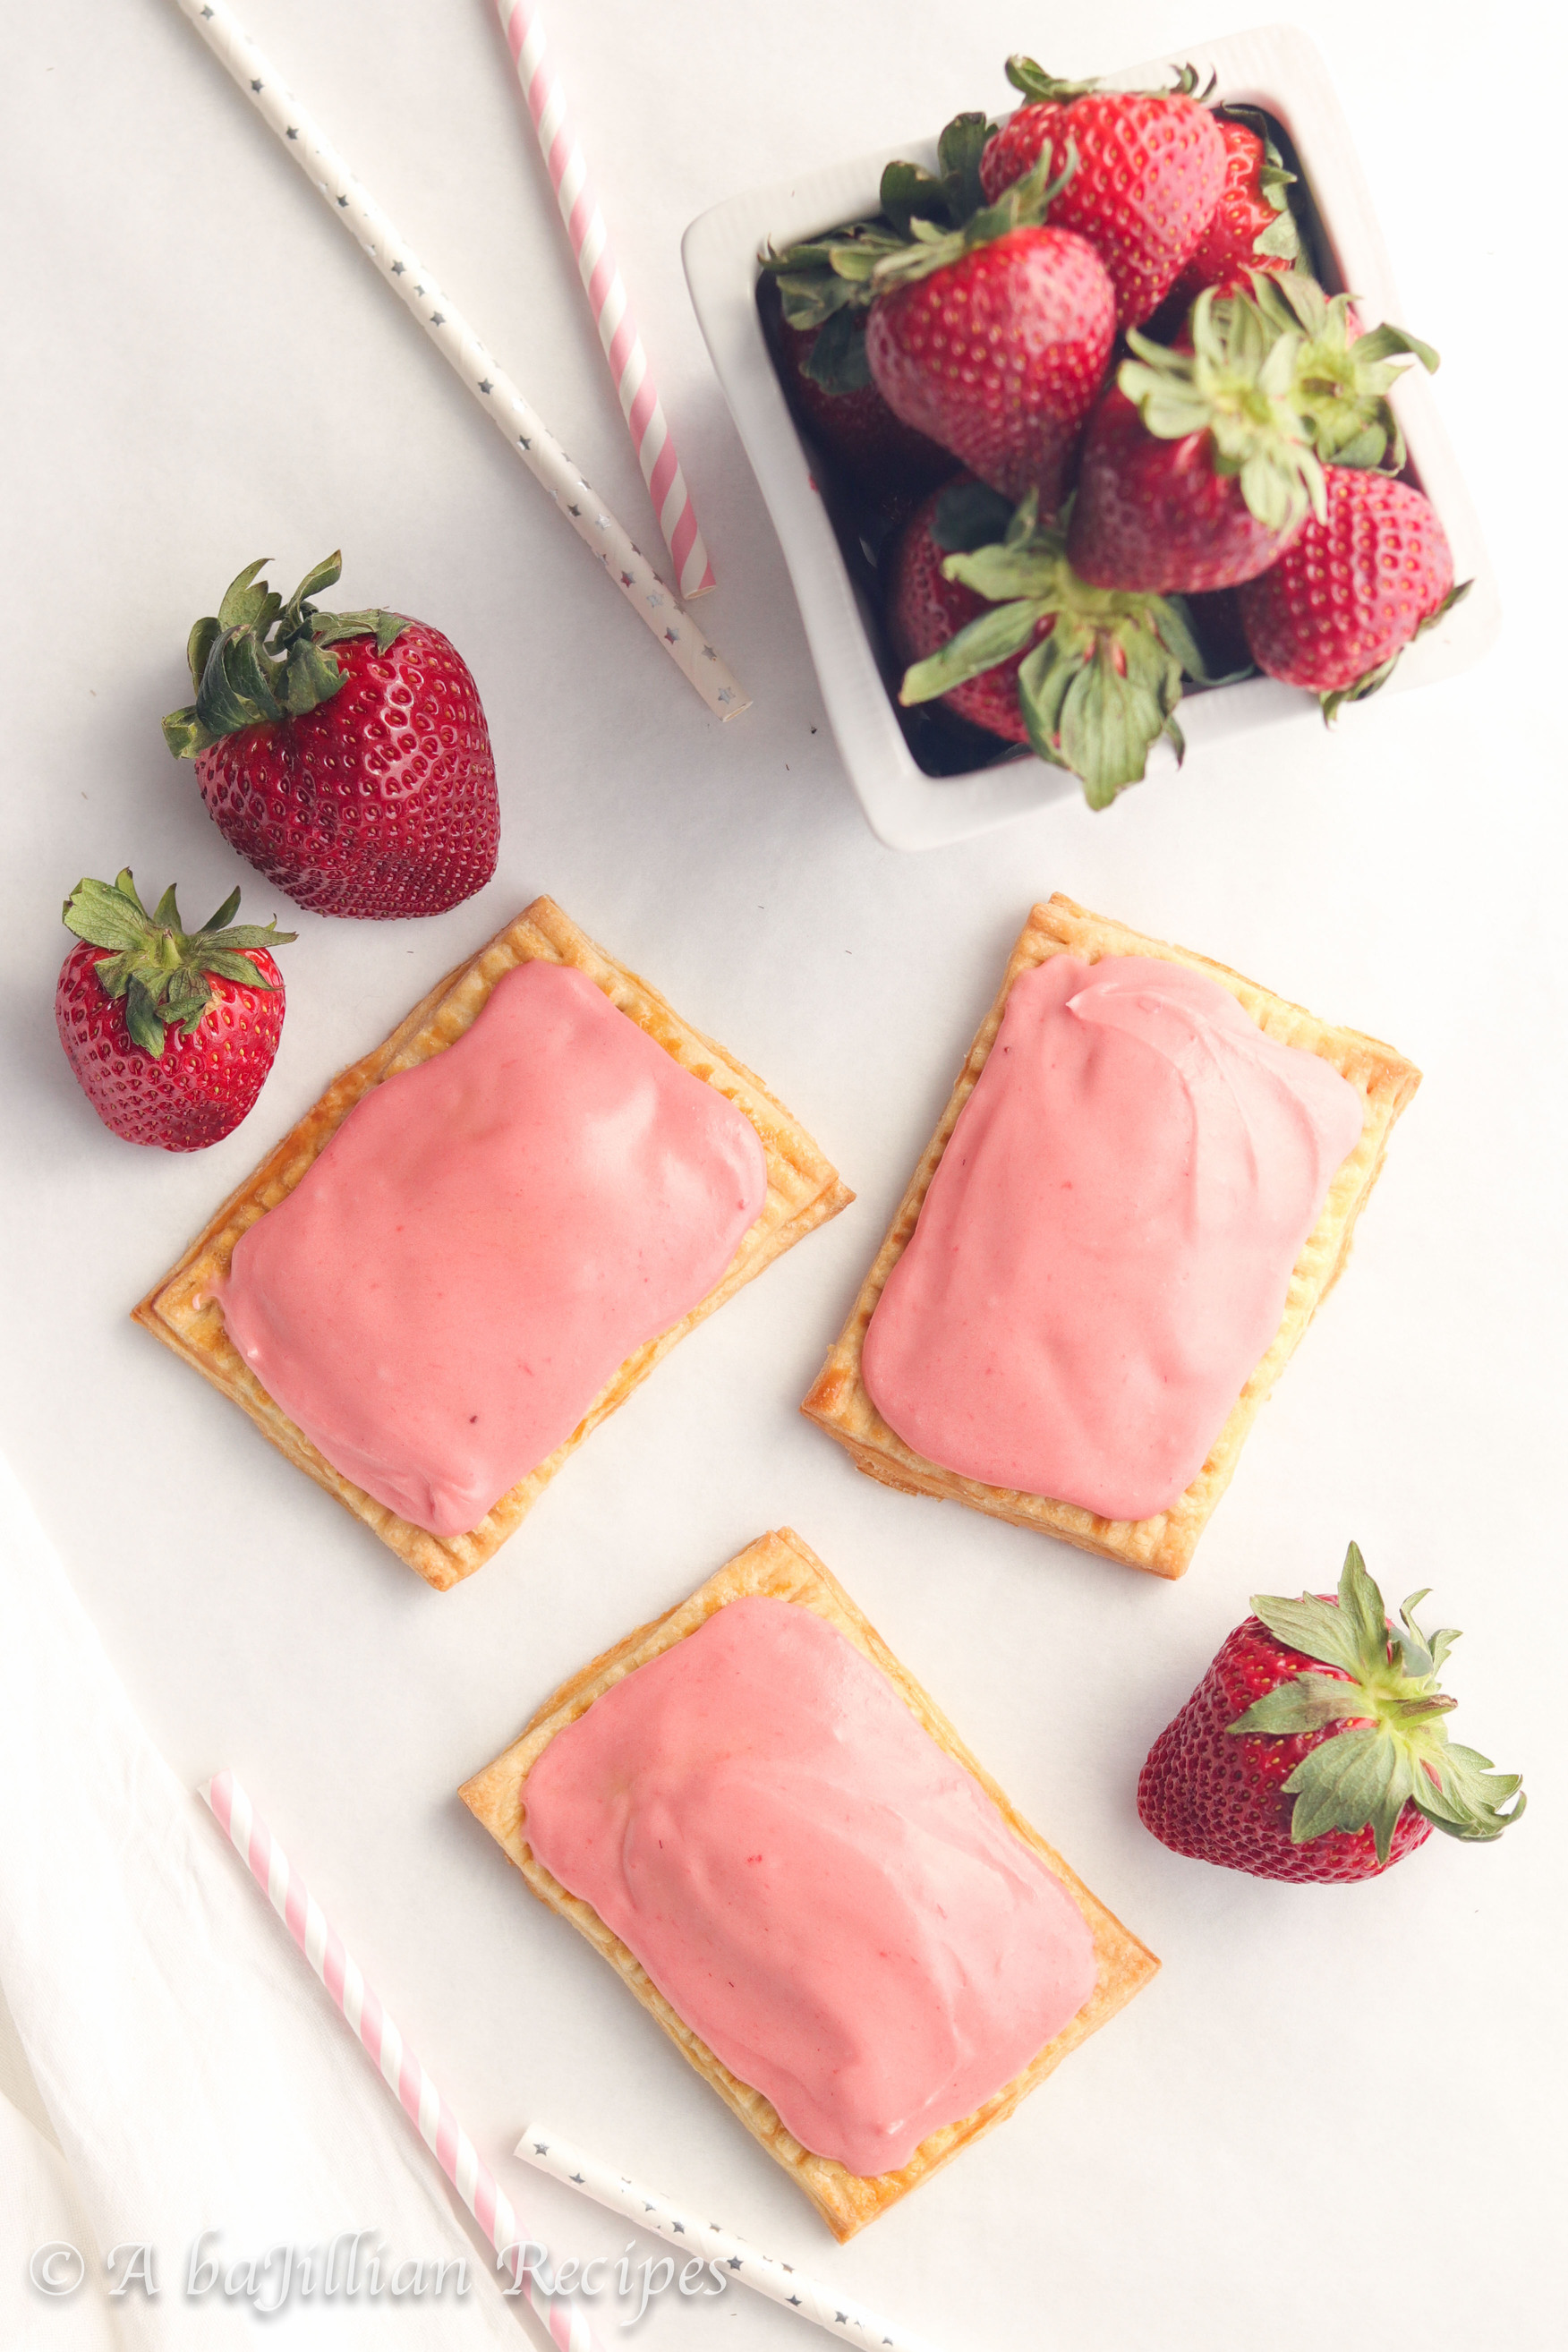
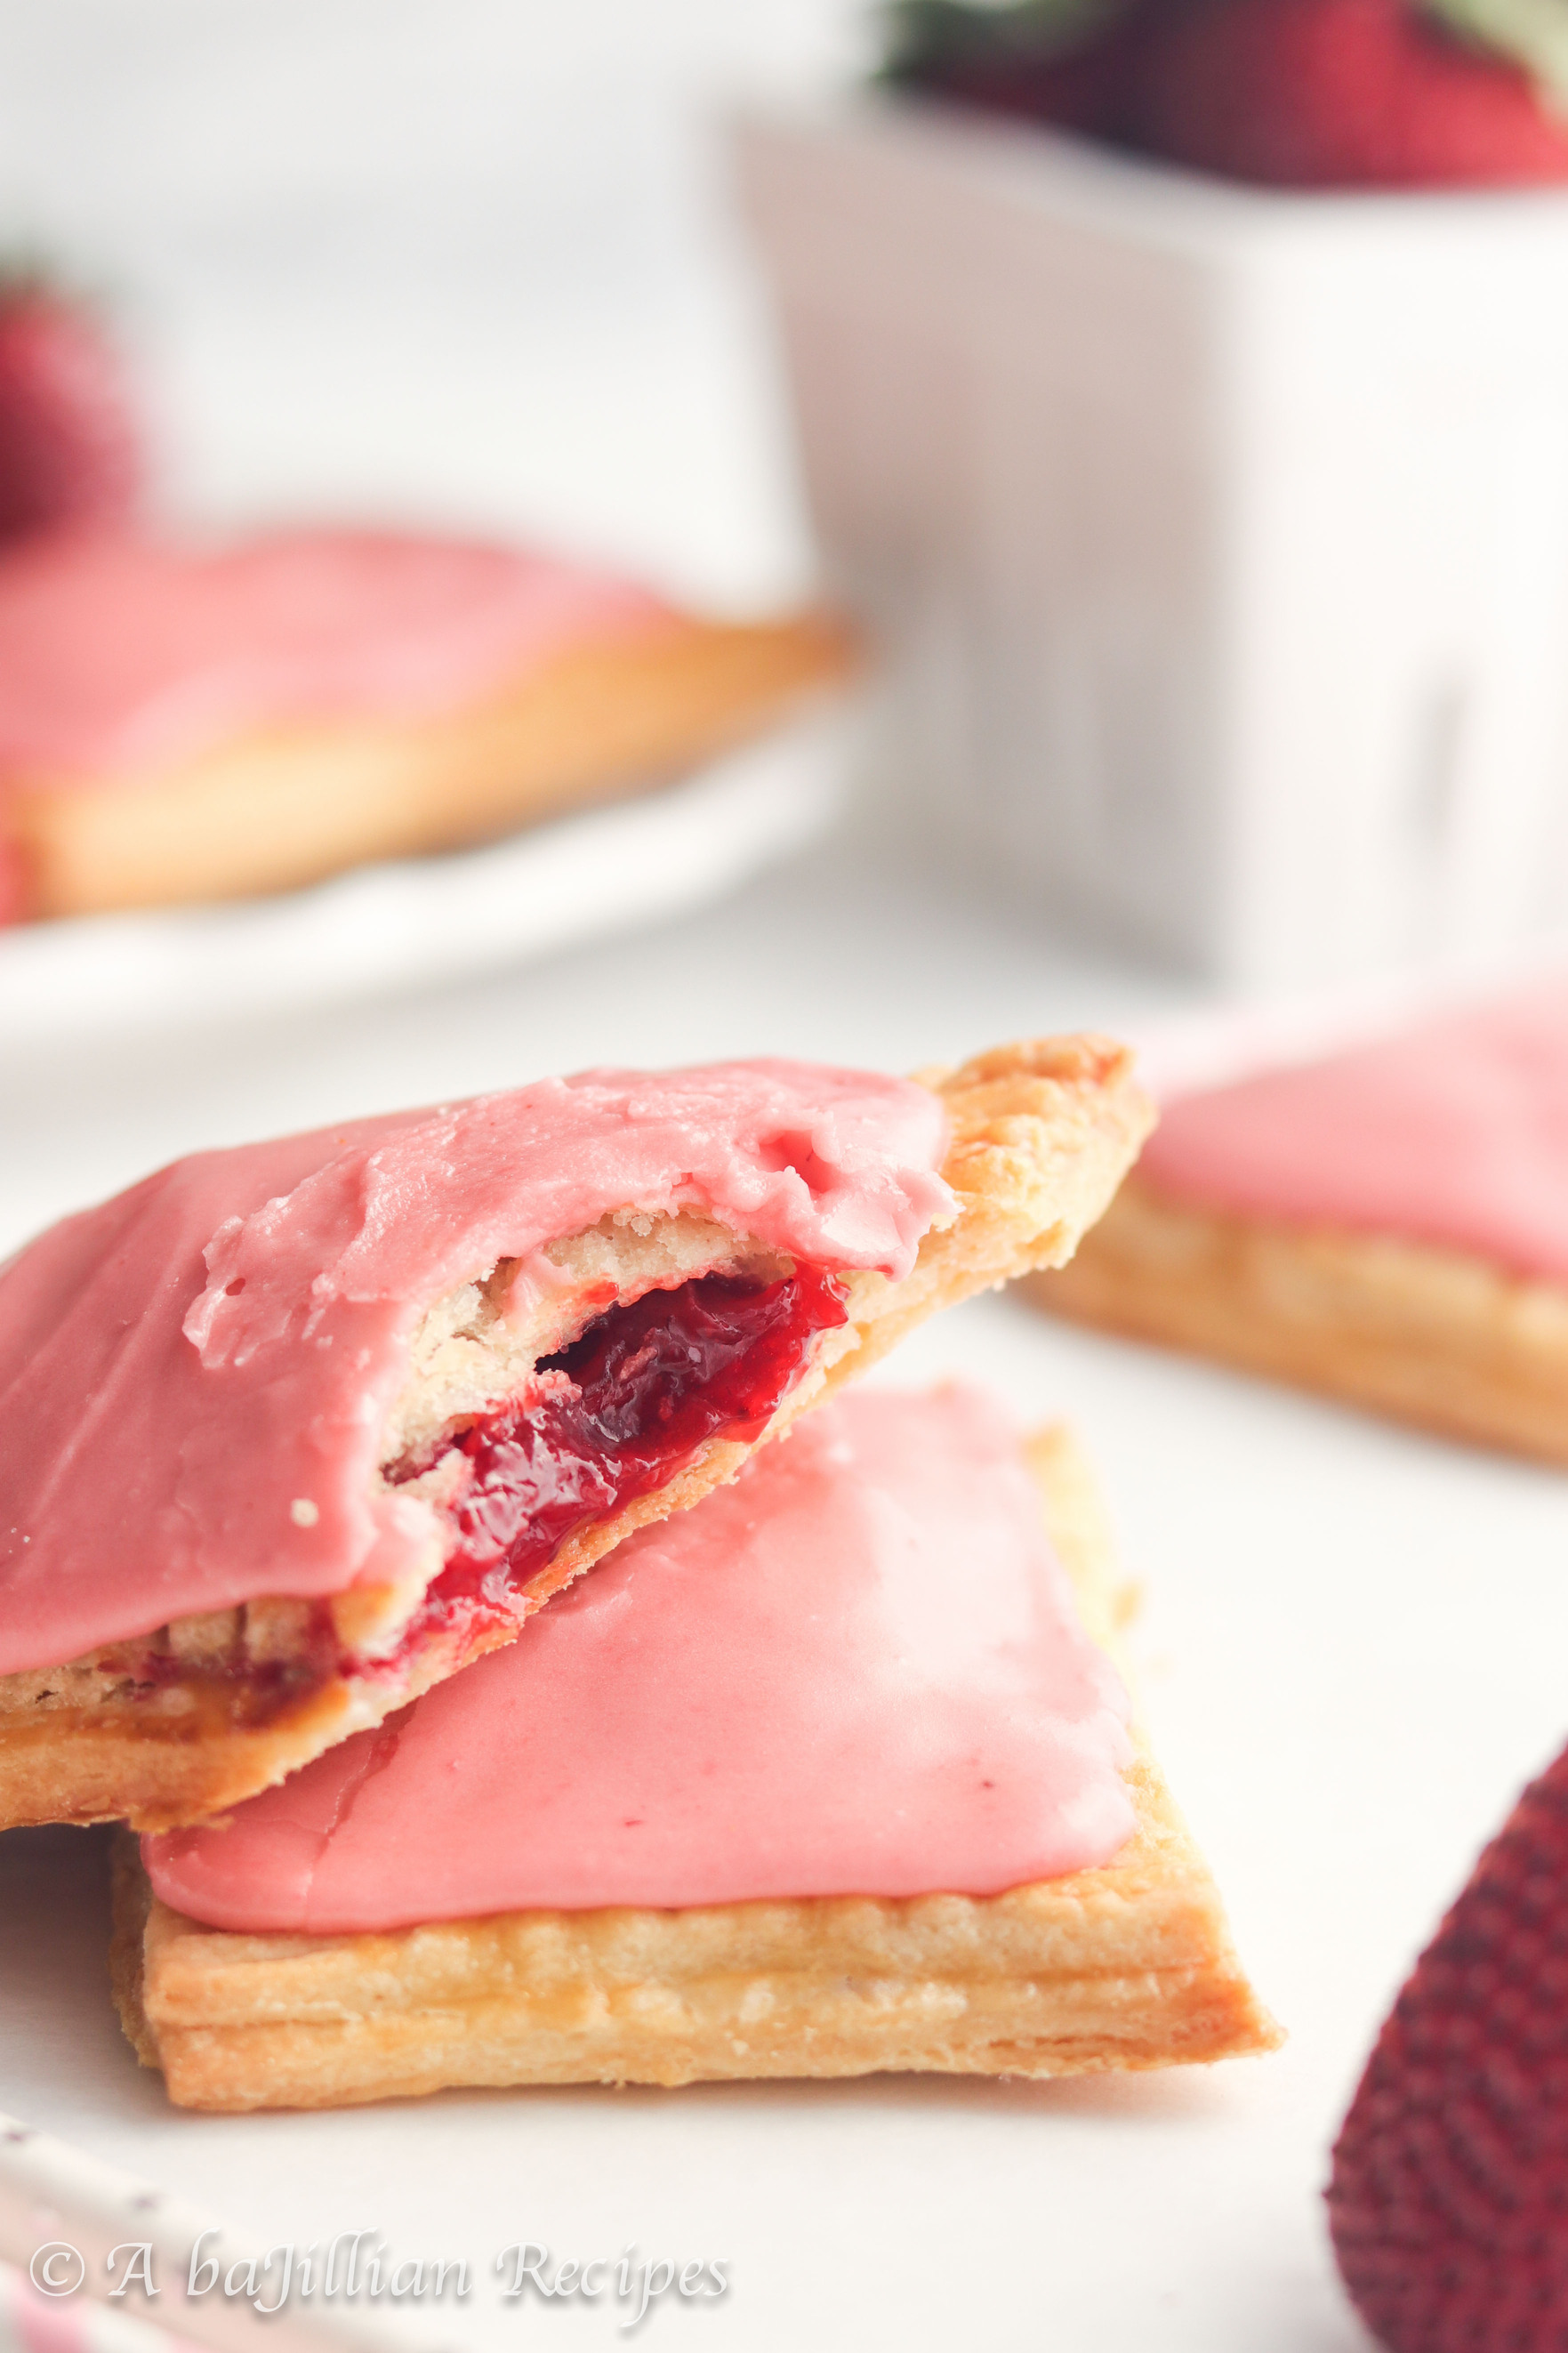
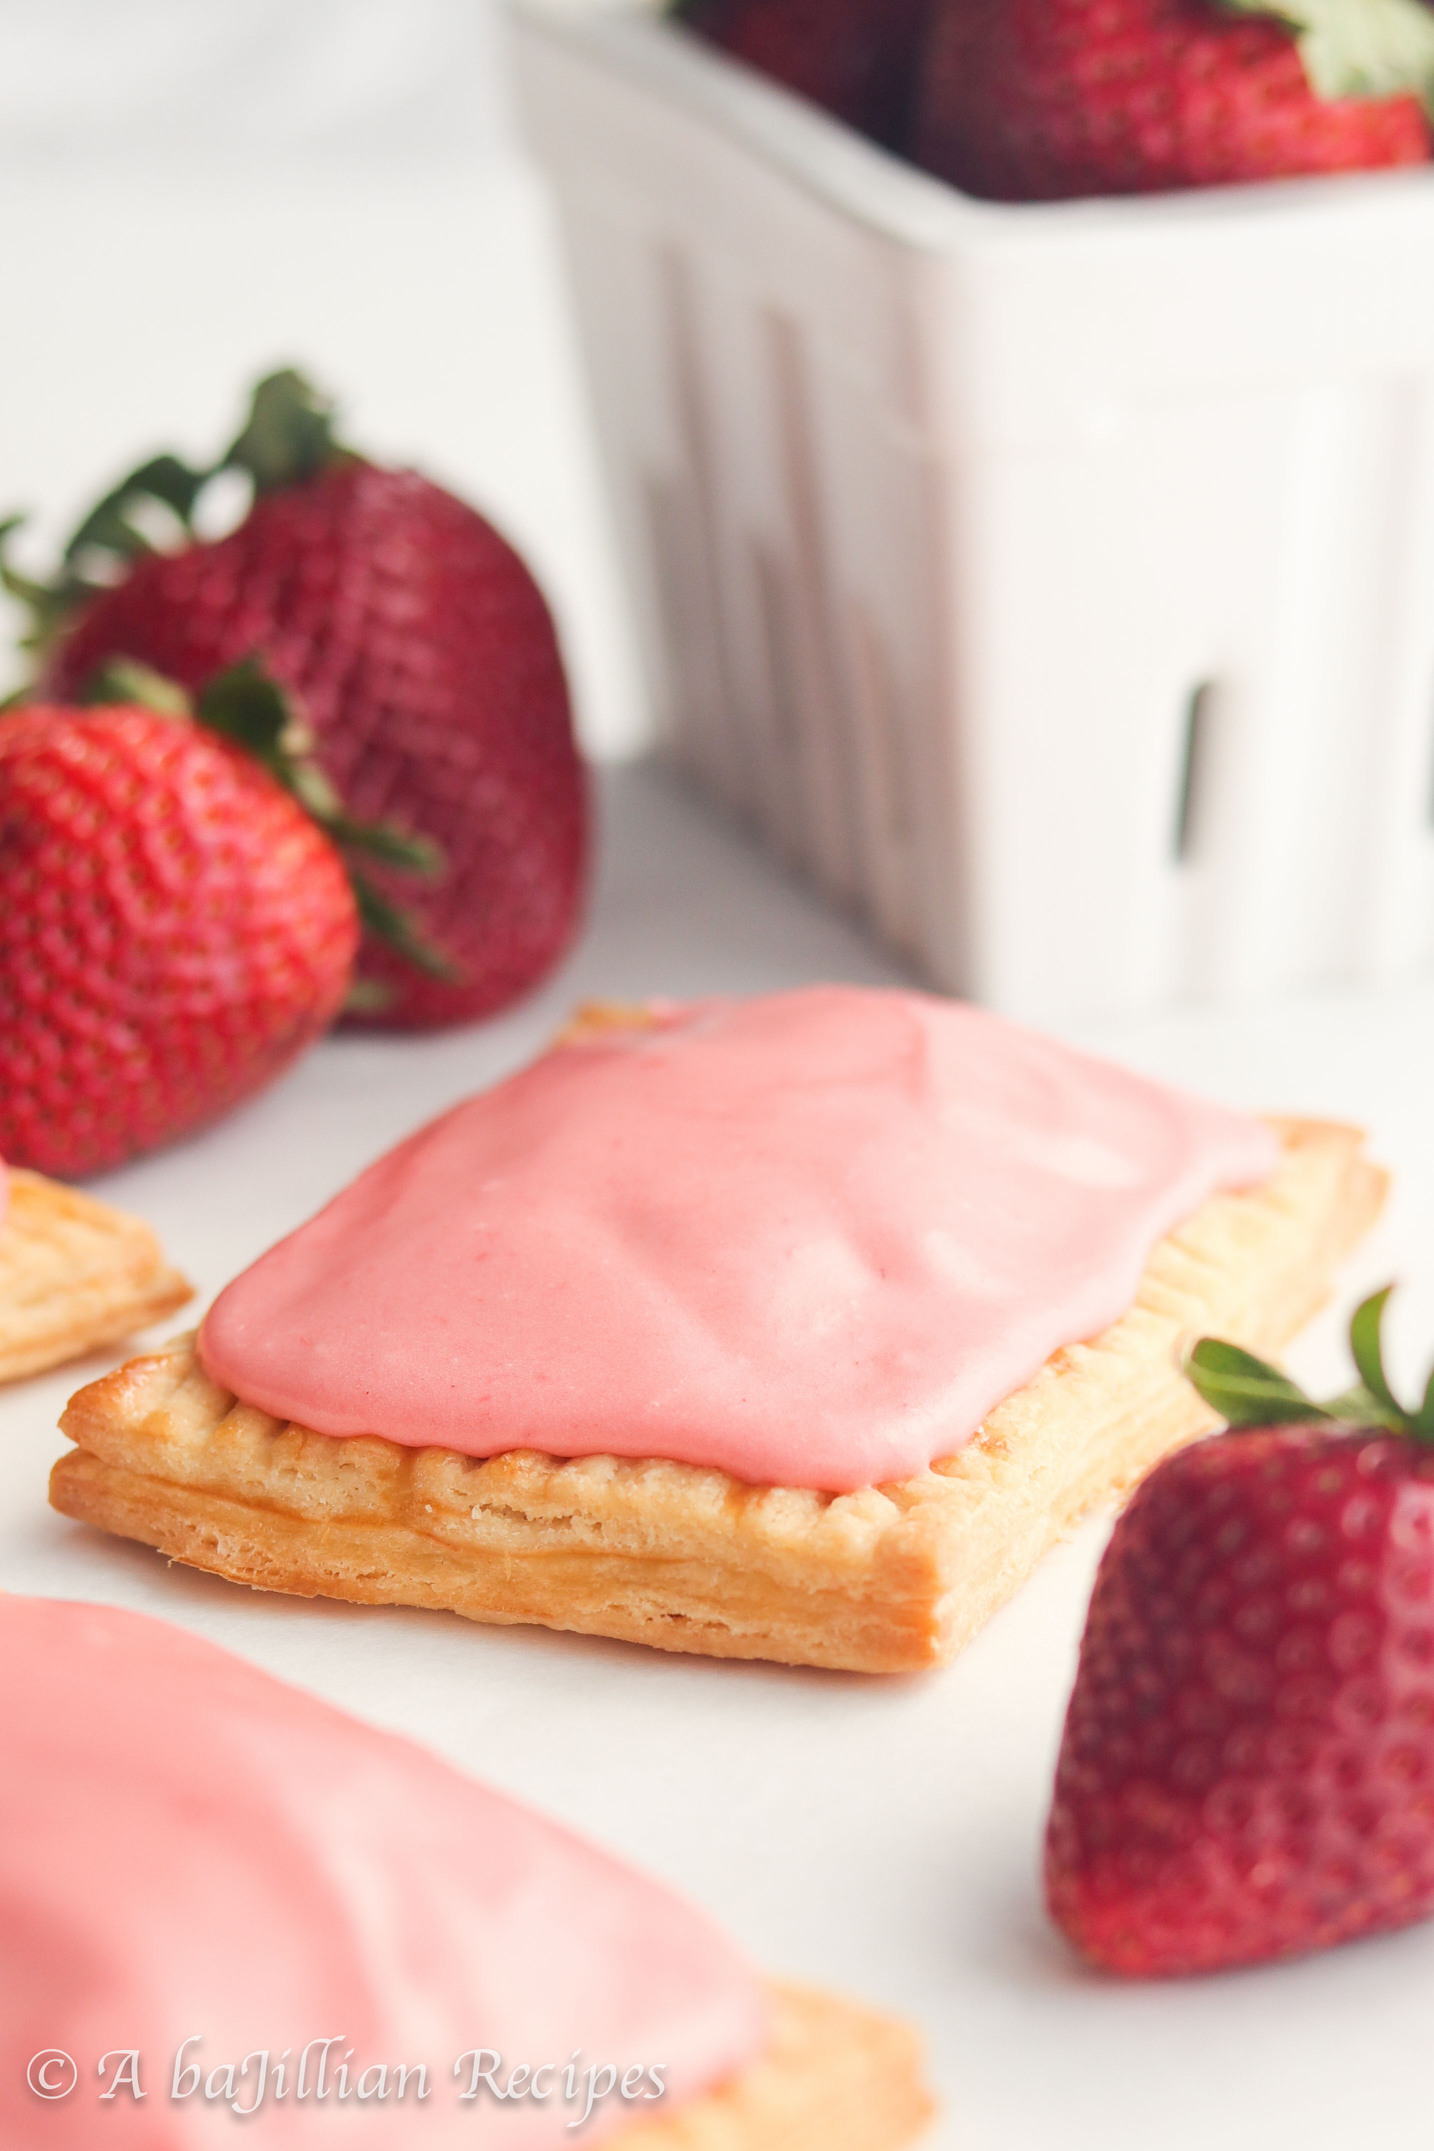
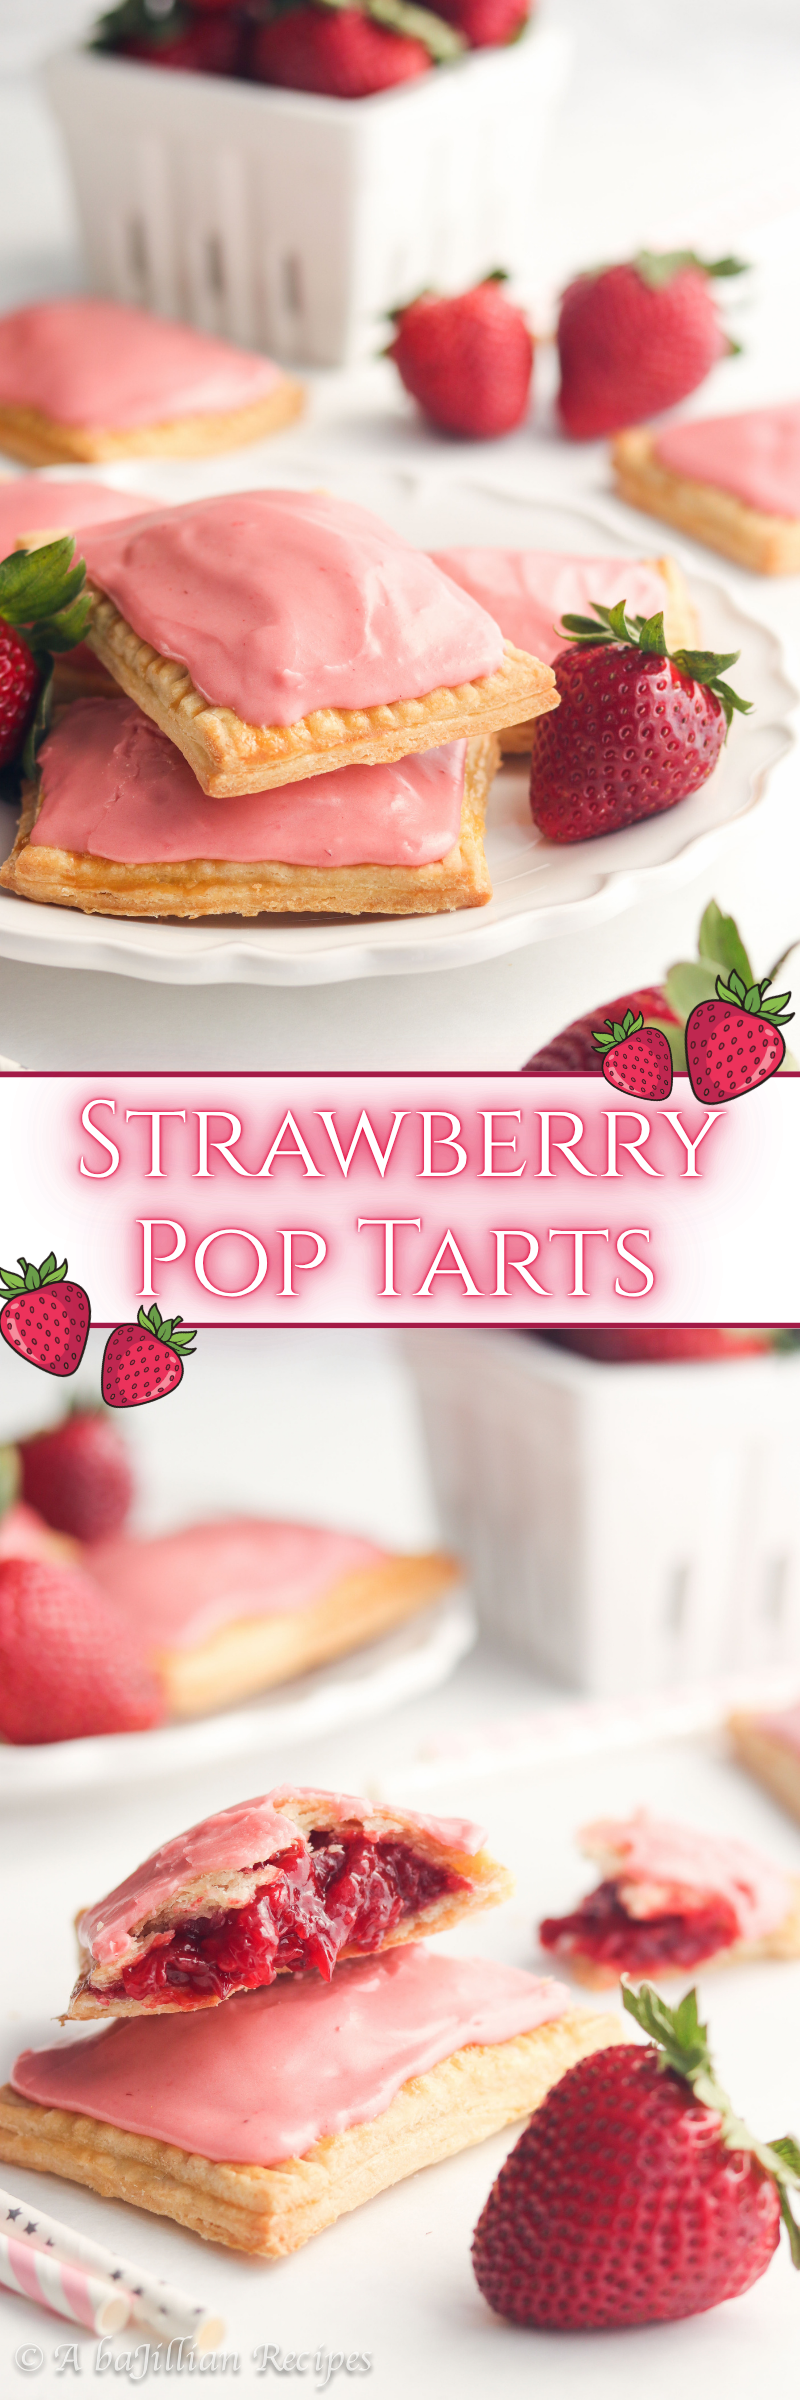
These Strawberry Pop Tarts are made with fresh strawberry filling, golden buttery pie crust, and luscious strawberry icing! A breakfast classic with a gourmet makeover!
Pop Tarts are definitely one of those nostalgic snacks most of us grew up on. They were easy, convenient, and the perfect before or after school snack. However, like many things from childhood, the novelty of Pop Tarts eventually wears off as our tastebuds mature and we discover just how dry and artificial they taste.
Thankfully, all is not lost, and there’s still a way to enjoy this iconic treat. That’s because I’ve got a gourmet and much more GROWN-UP version of the Pop Tart that is guaranteed to wow those tastebuds.
What Makes These Strawberry Pop Tarts WAY Better Than Store-Bought?
Flaky, Buttery Crust: Each golden pocket is perfectly flaky and slightly crispy along the edges. This ain’t your typical cardboard crust that the original contains.
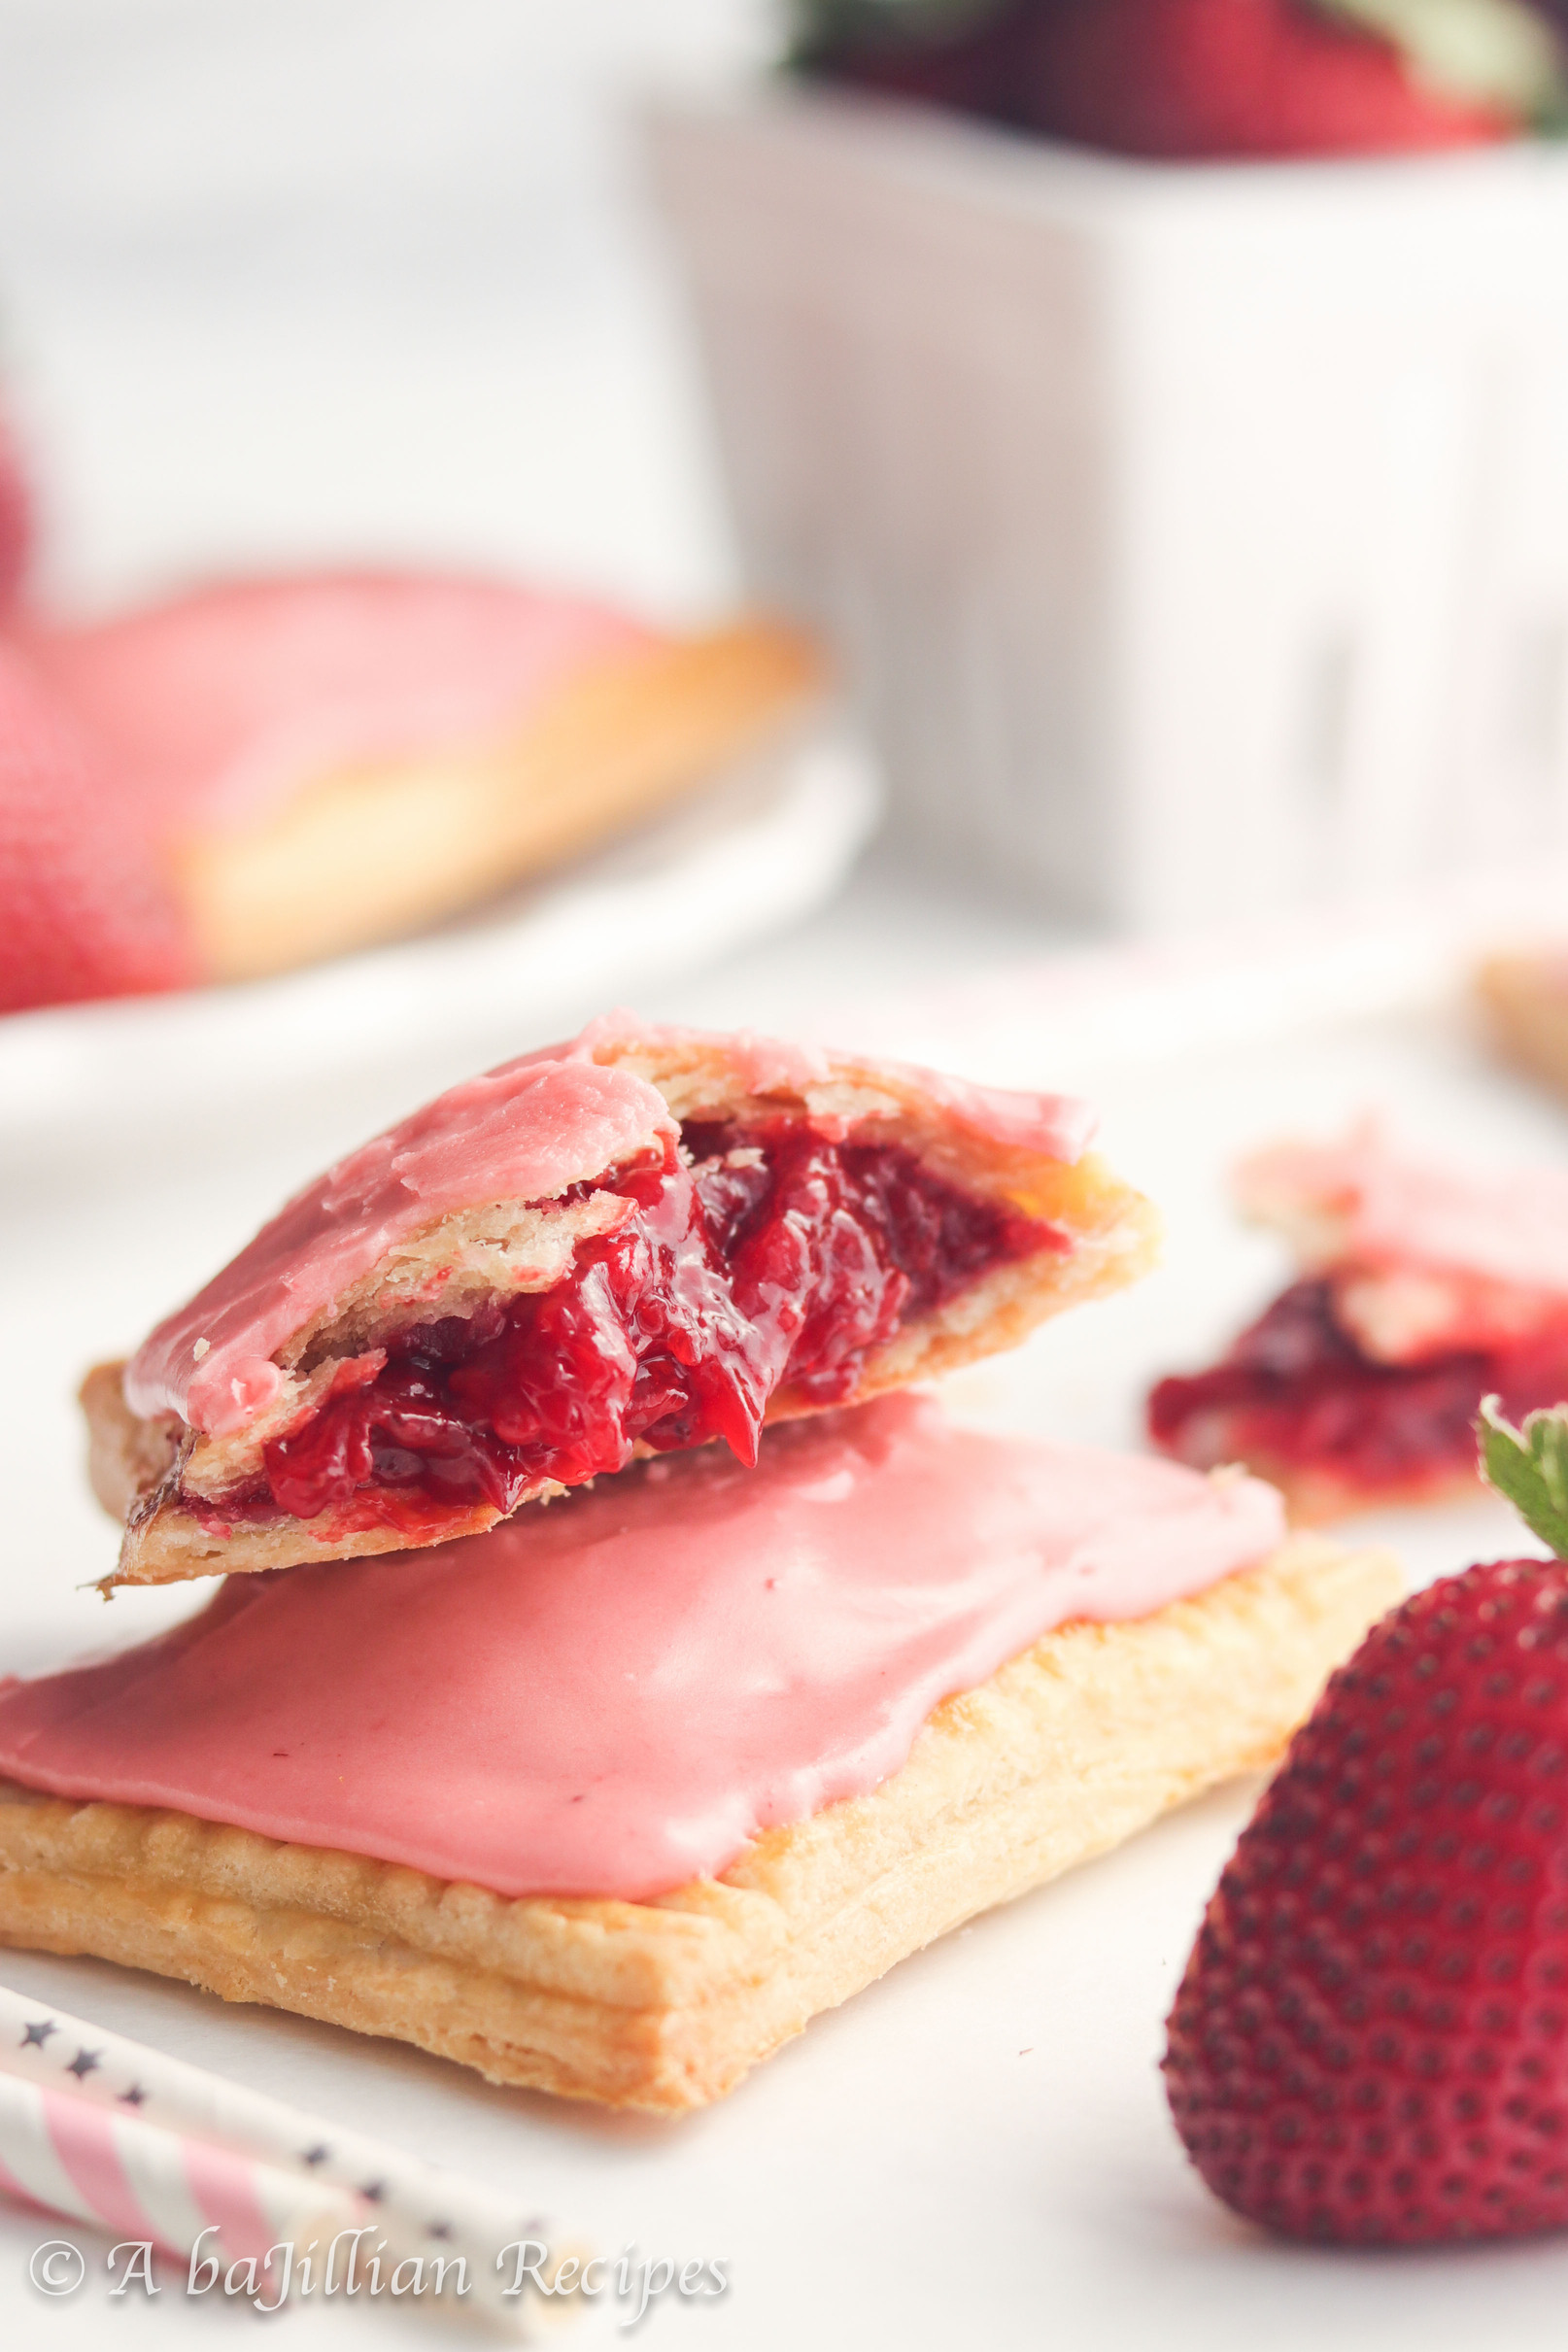
Fresh Strawberry Filling: Unlike the ones you buy at the store, these Strawberry Pop Tarts contain REAL strawberries. In fact, the recipe contains a whopping three cups, so each pop tart is absolutely stuffed with the most luscious strawberry filling.
Sweet Strawberry Icing: Just like the filling, the icing contains real strawberries as well. Just a tablespoon of the filling is added to give it that gorgeous pink hue.
Made With All REAL Ingredients: That’s right! No artificial flavors, colors, or preservatives!

Tips For Making The Best Strawberry Filling
Dice and Mash the Strawberries: Rather than simply slicing the strawberries, it’s important to cut them up into smaller pieces, so that you don’t end up with huge hunks of strawberries in the filling. Along with dicing the strawberries, you’ll want to mash some of the strawberries to extract more juice from them. You only need to mash about half of the strawberries because you still want little bits of strawberries throughout.
Simmer the Strawberries: In order to get that lusciously thick strawberry filling, it’s important to cook down some of the natural juices released from the strawberries. This also helps to boost the natural sweetness of the strawberries by concentrating the flavor. Once the berries start to boil, reduce the heat to simmer for about 10 minutes until some of the juices have reduced.
Add a Dash of Cinnamon: When it comes to berries, I always like to add at least a dash of ground cinnamon. It really enhances the sweetness of the berry and rounds out the flavors so incredibly well.
Chill the Filling Completely: The filling should be rather thick once it’s done cooking, but you really need to let it chill completely before it’s time to assemble the pop tarts. As it cools, it’ll thicken up even more, preventing any filling from leaking out of the pop tarts as they bake.
Tips for Assembling the Pop Tarts
Use a Ruler and a Pizza Cutter: If you want pristine pop tarts, you’ll definitely want to use a ruler when it comes time to cut the dough into rectangles. You’ll start by rolling out half of the dough until it’s about 1/8-inch thick–try to aim for a rectangular shape. Then use a ruler to make sure that you have enough surface to cut a 9×12-inch rectangle. Marking a few lines with a fork will also help to guide your cuts. Lay the ruler on top of the dough, creating the line you’re going to cut, then use a pizza cutter (or sharp knife) to glide along the ruler.
Match up the Rectangles First: No matter how precisely you measure, odds are you’ll probably end up with a few larger or smaller dough rectangles. So BEFORE you fill the pop tarts, do your best to pair each dough rectangle with another one that matches its size.
Don’t Over-Fill: I would aim for a tablespoon of filling per pop tart, but a heaping tablespoon works too. It might not seem like much, but you also need to be able to seal the pop tarts without squishing any filling out.
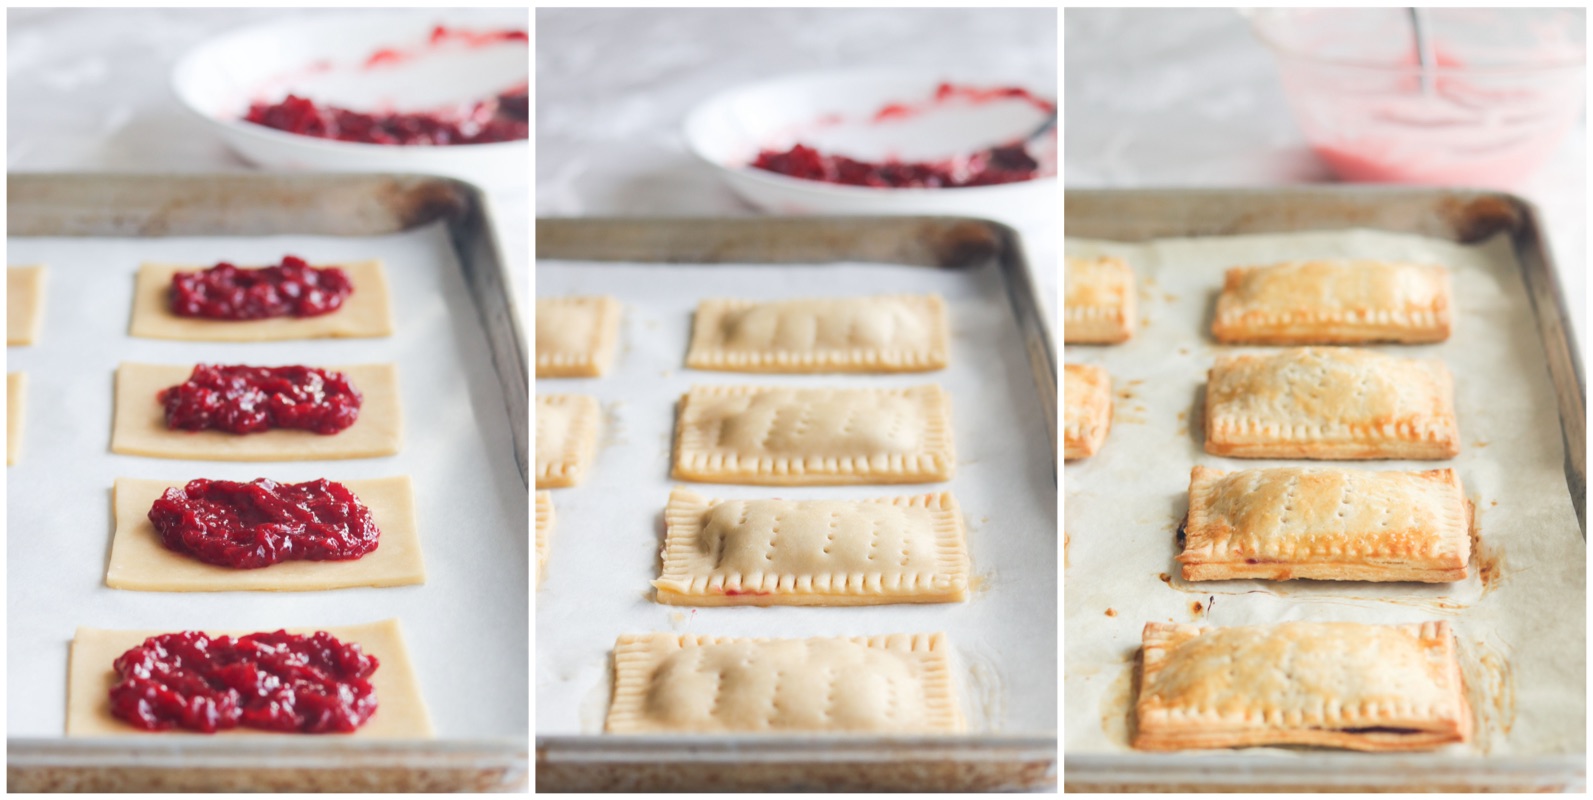
Vent the Pop Tarts: This crucial step allows steam to escape as the pop tarts bake. Once you’ve sealed and crimped the edges of the pop tarts, use a fork to poke some holes evenly throughout the top of the pop tart.
Chill the Pop Tarts: Before the pop tarts are ready to go in the oven, they need to chill in the refrigerator for about 20 minutes. Cold dough is required to obtain optimum flakiness, so giving the pop tarts that extra time to chill will result in perfectly flaky pastries.
Can I use pre-made pie dough?
Of course! While the results might not be as flaky as homemade, this is a great shortcut to save you some time.
Can I use jam or preserves instead?
You most definitely can, however, there’s really no beating this homemade strawberry filling. If you don’t have access to fresh strawberries or if strawberries just aren’t in season, jam/preserves are a great alternative.
Can I toast these pop tarts?
No. Unlike the ones you buy at the store, these pop tarts don’t require any toasting, and I definitely wouldn’t recommend it. The icing will most likely melt all over the place, and you’ll end up with a real mess on your hands. If you want to eat these pop tarts warm, just heat them in the microwave for about 10-15 seconds.
Do these pop tarts freeze well?
Yes, they freeze incredibly well! Just wrap each pop tart individually in plastic wrap, slide them into a freezer-safe ziplock bag, and store them in the freezer for up to six months. When you’re ready to enjoy one, just take one out of the freezer and allow it to thaw at room temperature for about an hour.
Do you have anymore pop tart recipes?
I’m so glad you asked because YES I DO! Check out my recipe for Blackberry Pop Tarts right over here! You’ll also read more tips on how to master your homemade pop tarts.

Strawberry Pop Tarts
Ingredients
Strawberry Filling:
- 3 cups chopped fresh strawberries (about 15 ounces)
- ½ cup granulated sugar
- 2 Tablespoons cornstarch
- ⅛ teaspoon cinnamon
- Pinch of salt
- 1 Tablespoon lemon juice
Pie Dough:
- 6 Tablespoons water
- 2 Tablespoons sour cream
- 2 ½ cup all-purpose flour
- 2 Tablespoon granulated sugar
- 1 teaspoon salt
- ½ cup shortening, cut into 1/2-inch pieces
- ½ cup unsalted butter, cold
- Egg wash: 1 egg beaten
Strawberry Icing:
- 1 ¾ cups powdered sugar
- 2 Tablespoons milk or heavy cream
- 1 Heaping Tablespoon strawberry filling, strained to remove seeds
- 2 teaspoons lemon juice
- Pinch salt
Instructions
Make the Filling:
- In a medium saucepan, heat the strawberries over medium heat, stirring constantly, until they soften and their juices start to release. Mash them with a potato masher or large fork until no large pieces remain. Cook for 10 minutes, allowing some of the juices to reduce.
- In a separate bowl, combine the sugar, cornstarch, cinnamon, and salt. Add mixture to the berries and continue cooking until it begins to thicken, about 1-2 minutes. Remove from heat, and pour into a shallow bowl.
- Stir in the lemon juice and place in the refrigerator to cool completely.
Make the Pie Dough:
- In a small bowl, combine the water and sour cream; set aside.
- In a large mixing bowl, stir the flour, sugar and salt together. Scatter the shortening over the flour, then use a cheese grater to grate the butter on top. Using a fork or a pastry blender, cut the mixture together until it resembles coarse crumbs.
- Add the sour cream mixture and use a stiff rubber spatula to stir and press the dough together until it forms one big mound. If dough is still too dry and doesn’t hold together, add another tablespoon of water.
- Divide the dough into two halves. Turn each half onto a piece of plastic wrap and flatten into a 5-inch disk. Wrap tightly and refrigerate for at least one hour.
Assemble the Pop Tarts:
- On a lightly-floured work surface, roll out one of the discs of chilled dough (keep the other one in the refrigerator). Roll it into a rectangle about 1/8-inch thick and 9×12 inches in size. Trim the sides as needed. Using a pizza cutter or knife, cut 9 rectangles, each measuring 3×4 inches. Using a ruler will make this process much easier and more accurate.
- Place the 9 rectangles onto a baking sheet lined with parchment paper. Place the baking sheet in the fridge.
- Roll the second disc out into a rectangle, and cut into 9 even rectangles like you did with the first disc. Put the rectangles on a parchment paper-lined baking sheet and place in the refrigerator.
- Remove the first baking sheet of rectangles from the refrigerator. Brush egg wash along the border of each rectangle. This will act as the "glue". Place a heaping tablespoon of the strawberry filling into the center of each rectangle, spread it around, leaving around 1/2 inch of space on the edges.
- Remove the second baking sheet of rectangles from the refrigerator and place each one on top of the filling-topped rectangles. Use your fingertips to press firmly around the pocket of filling, sealing the dough well on all sides. Crimp the edges with a fork, then poke holes evenly on top each pop tart to vent.
- Place the filled pop tarts in the refrigerator for at least 20 minutes. Preheat the oven to 400ºF.
- Once pop tarts have chilled, lightly brush the tops with egg wash. Bake for about 15-17 minutes, or until they’re golden brown. Remove from the oven and allow to cool completely.
Make the Icing:
- Place the powdered sugar and milk/cream in a medium bowl. Strain the heaping tablespoon of strawberry filling through a fine mesh sieve into the bowl. Whisk everything together until smooth. Stir in the lemon juice and salt. Add more milk or powdered sugar to achieve the right consistency.
- Once the pop tarts have cooled, spoon a heaping tablespoon of icing on top. Spread evenly with a butter knife or offset spatula. Repeat with remaining pop tarts.
- To store, keep pop tarts sealed in an airtight container in the refrigerator for up to 5 days.