

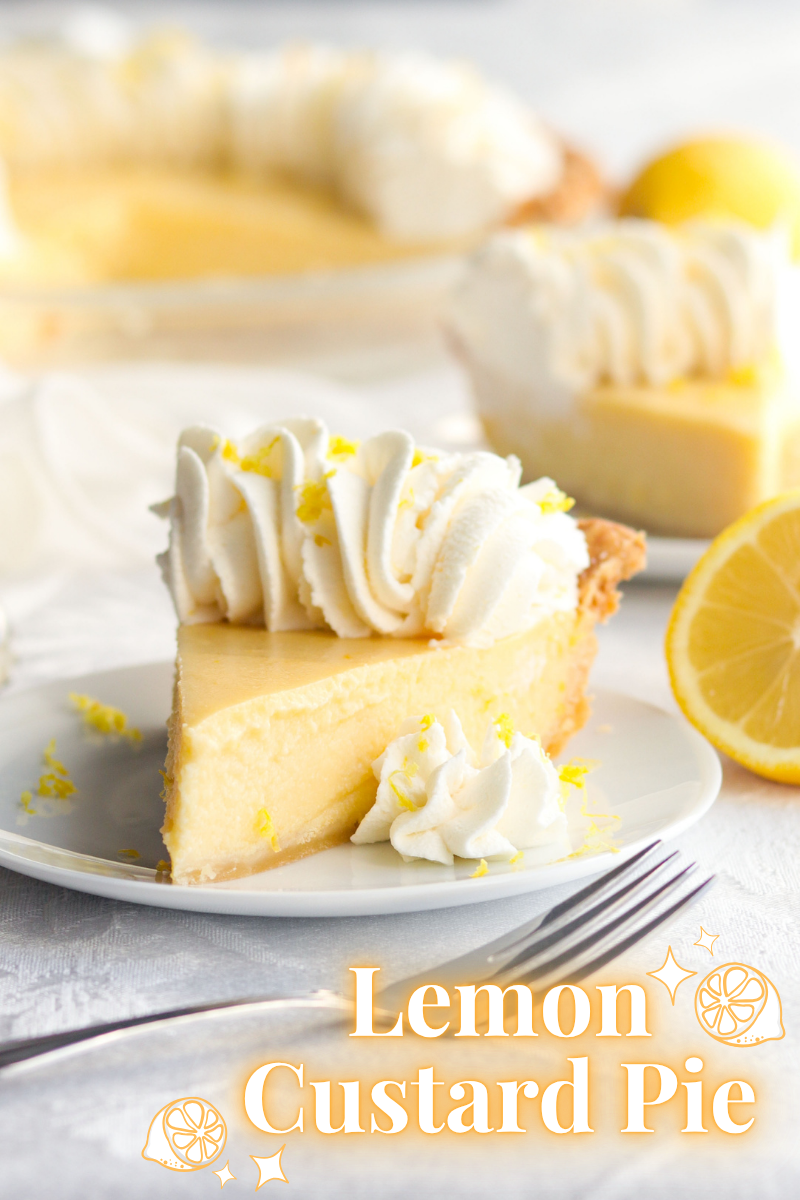
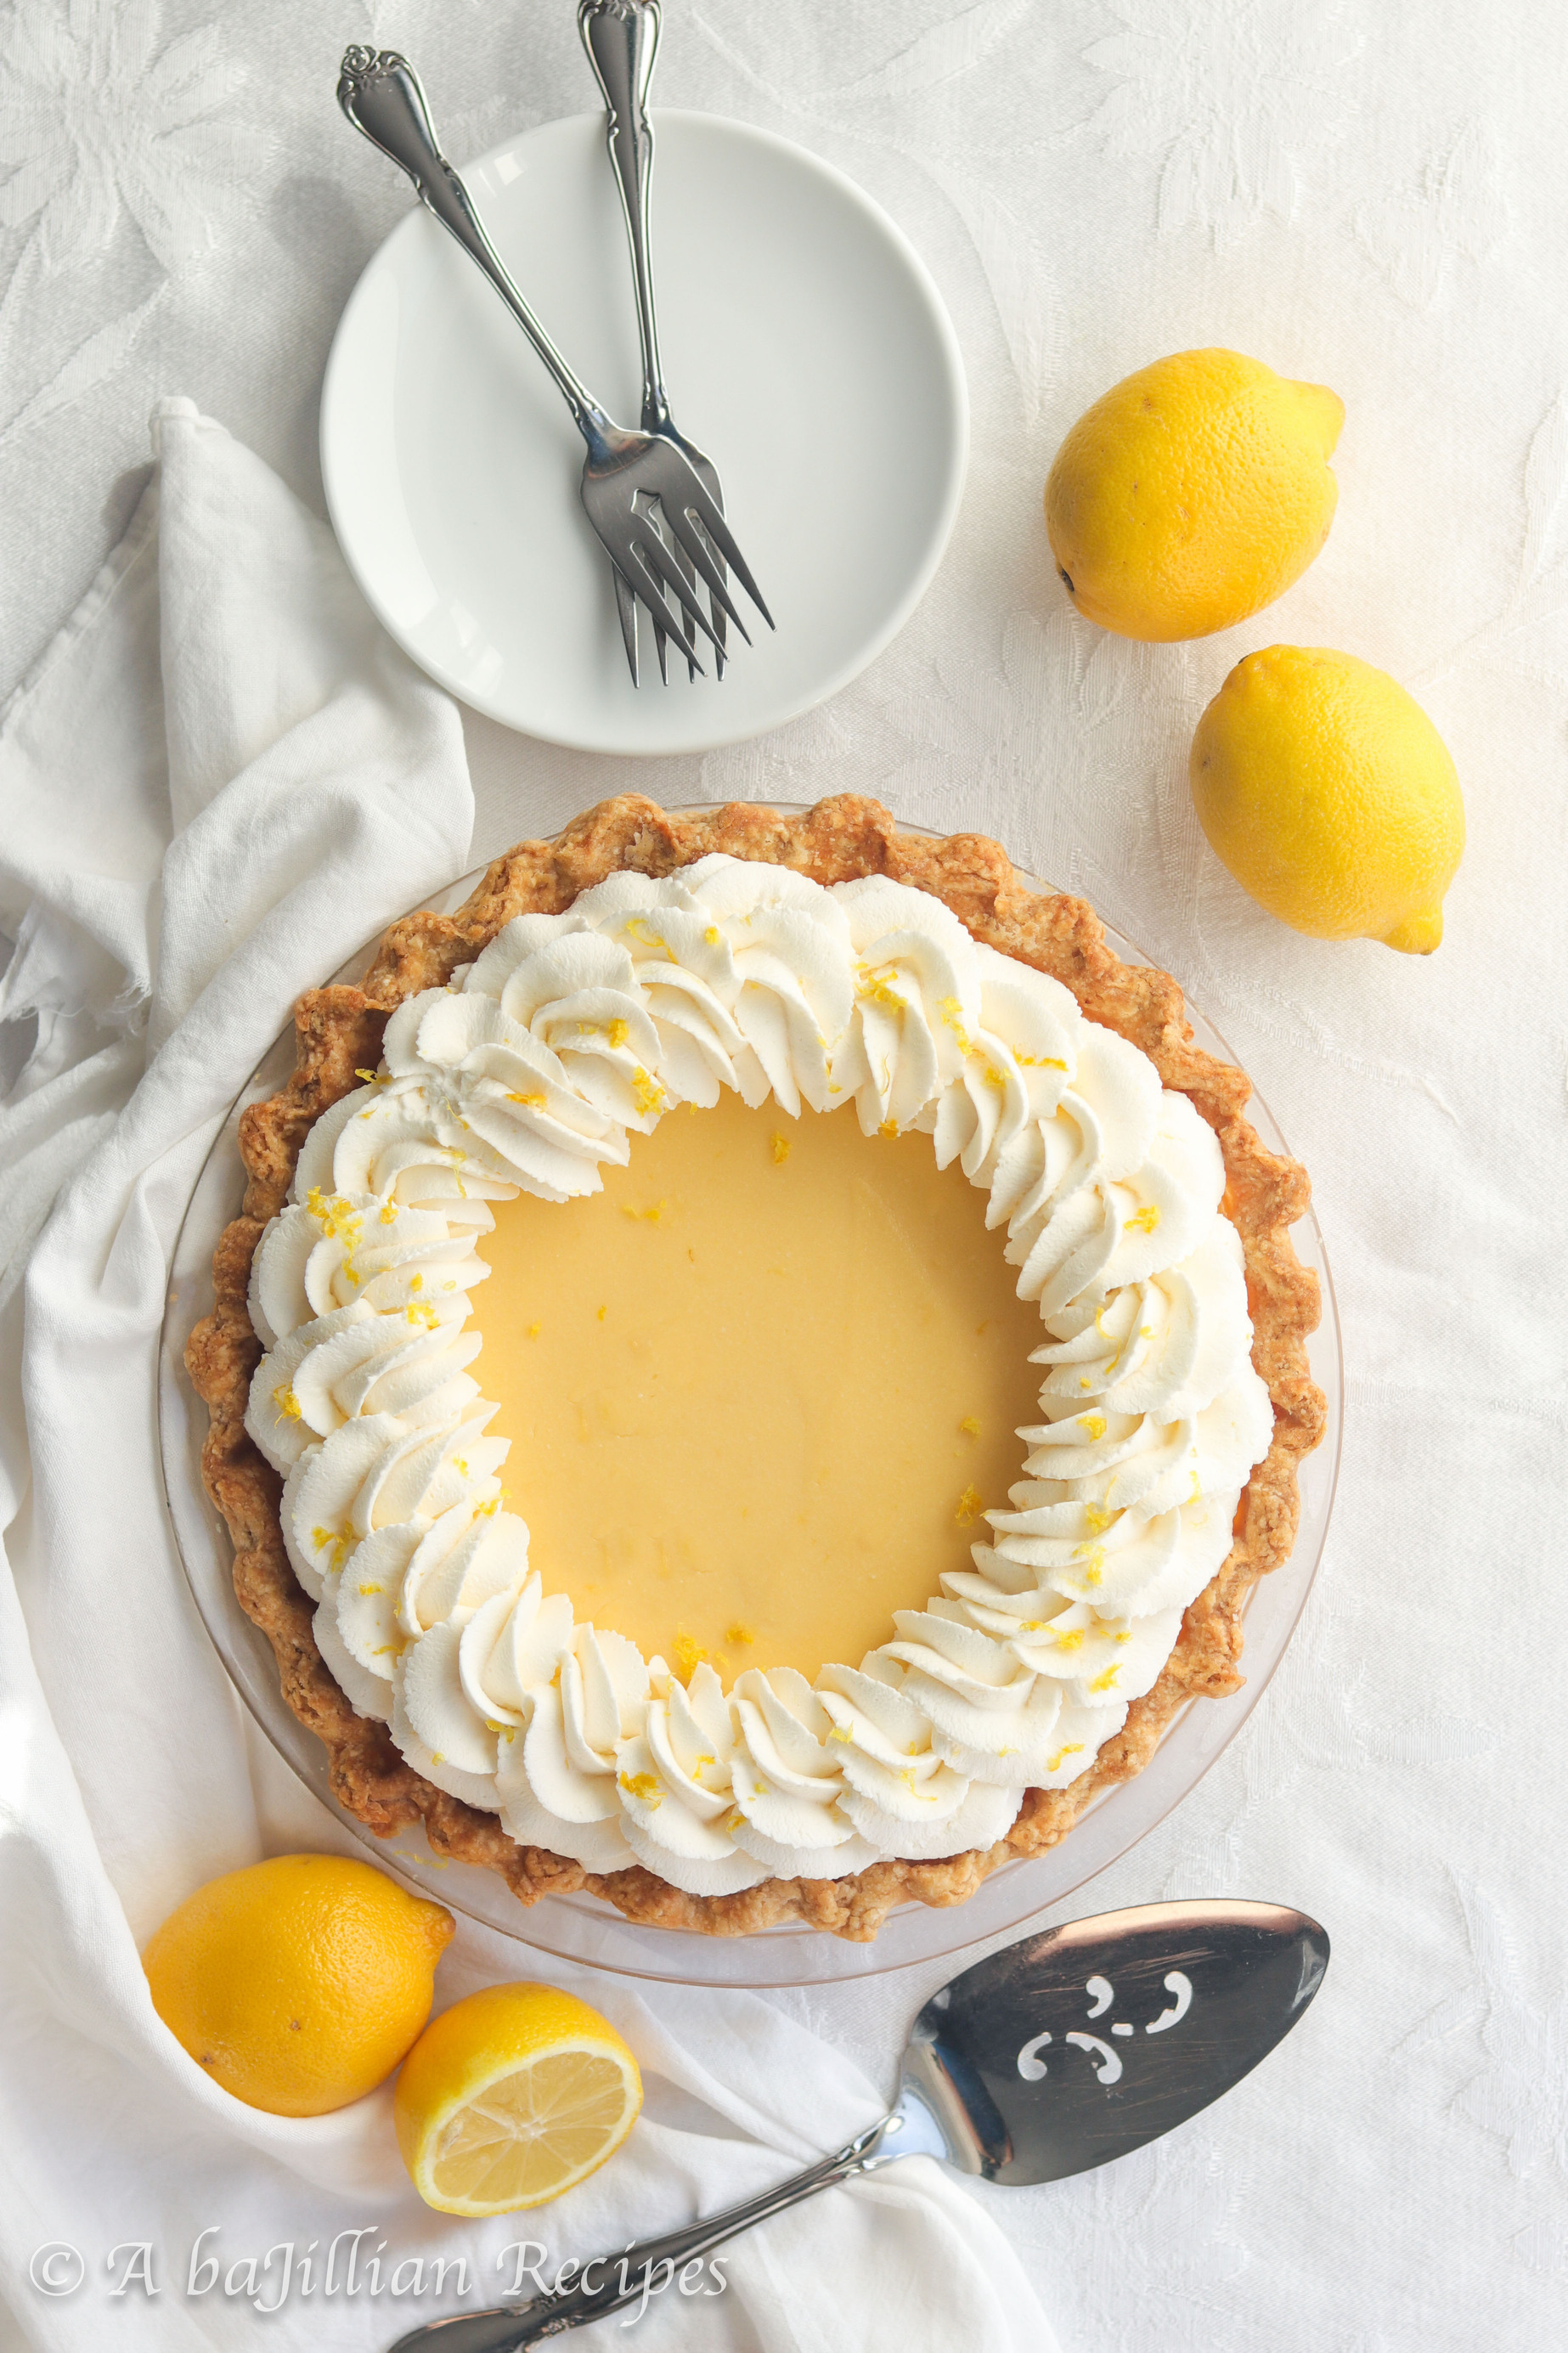
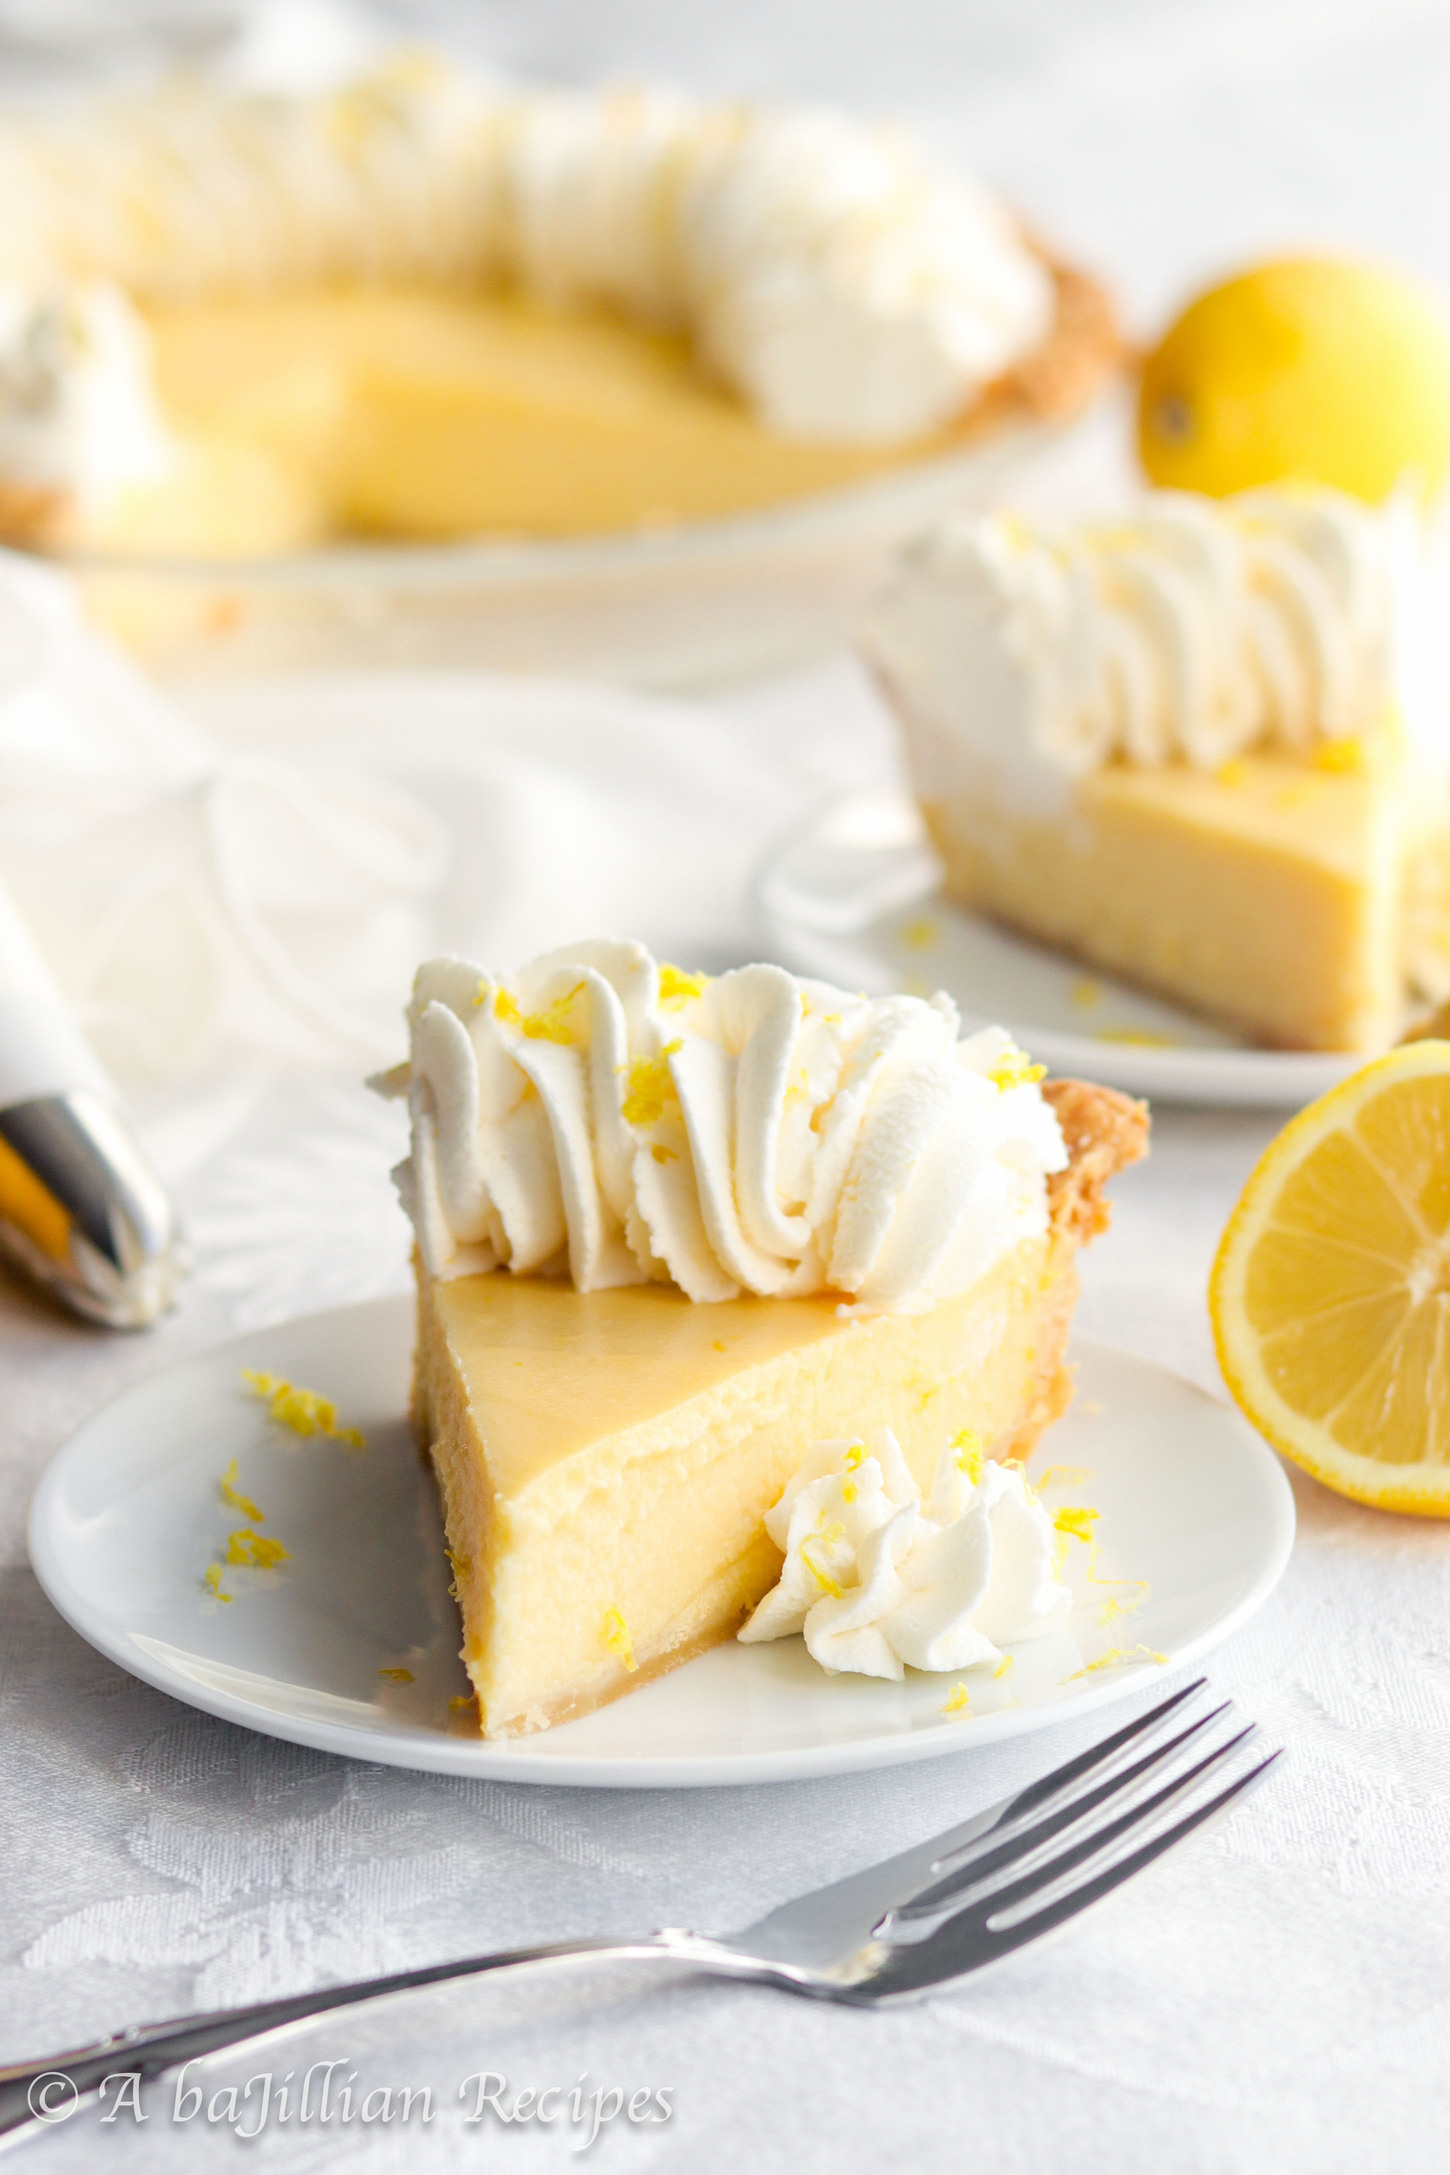
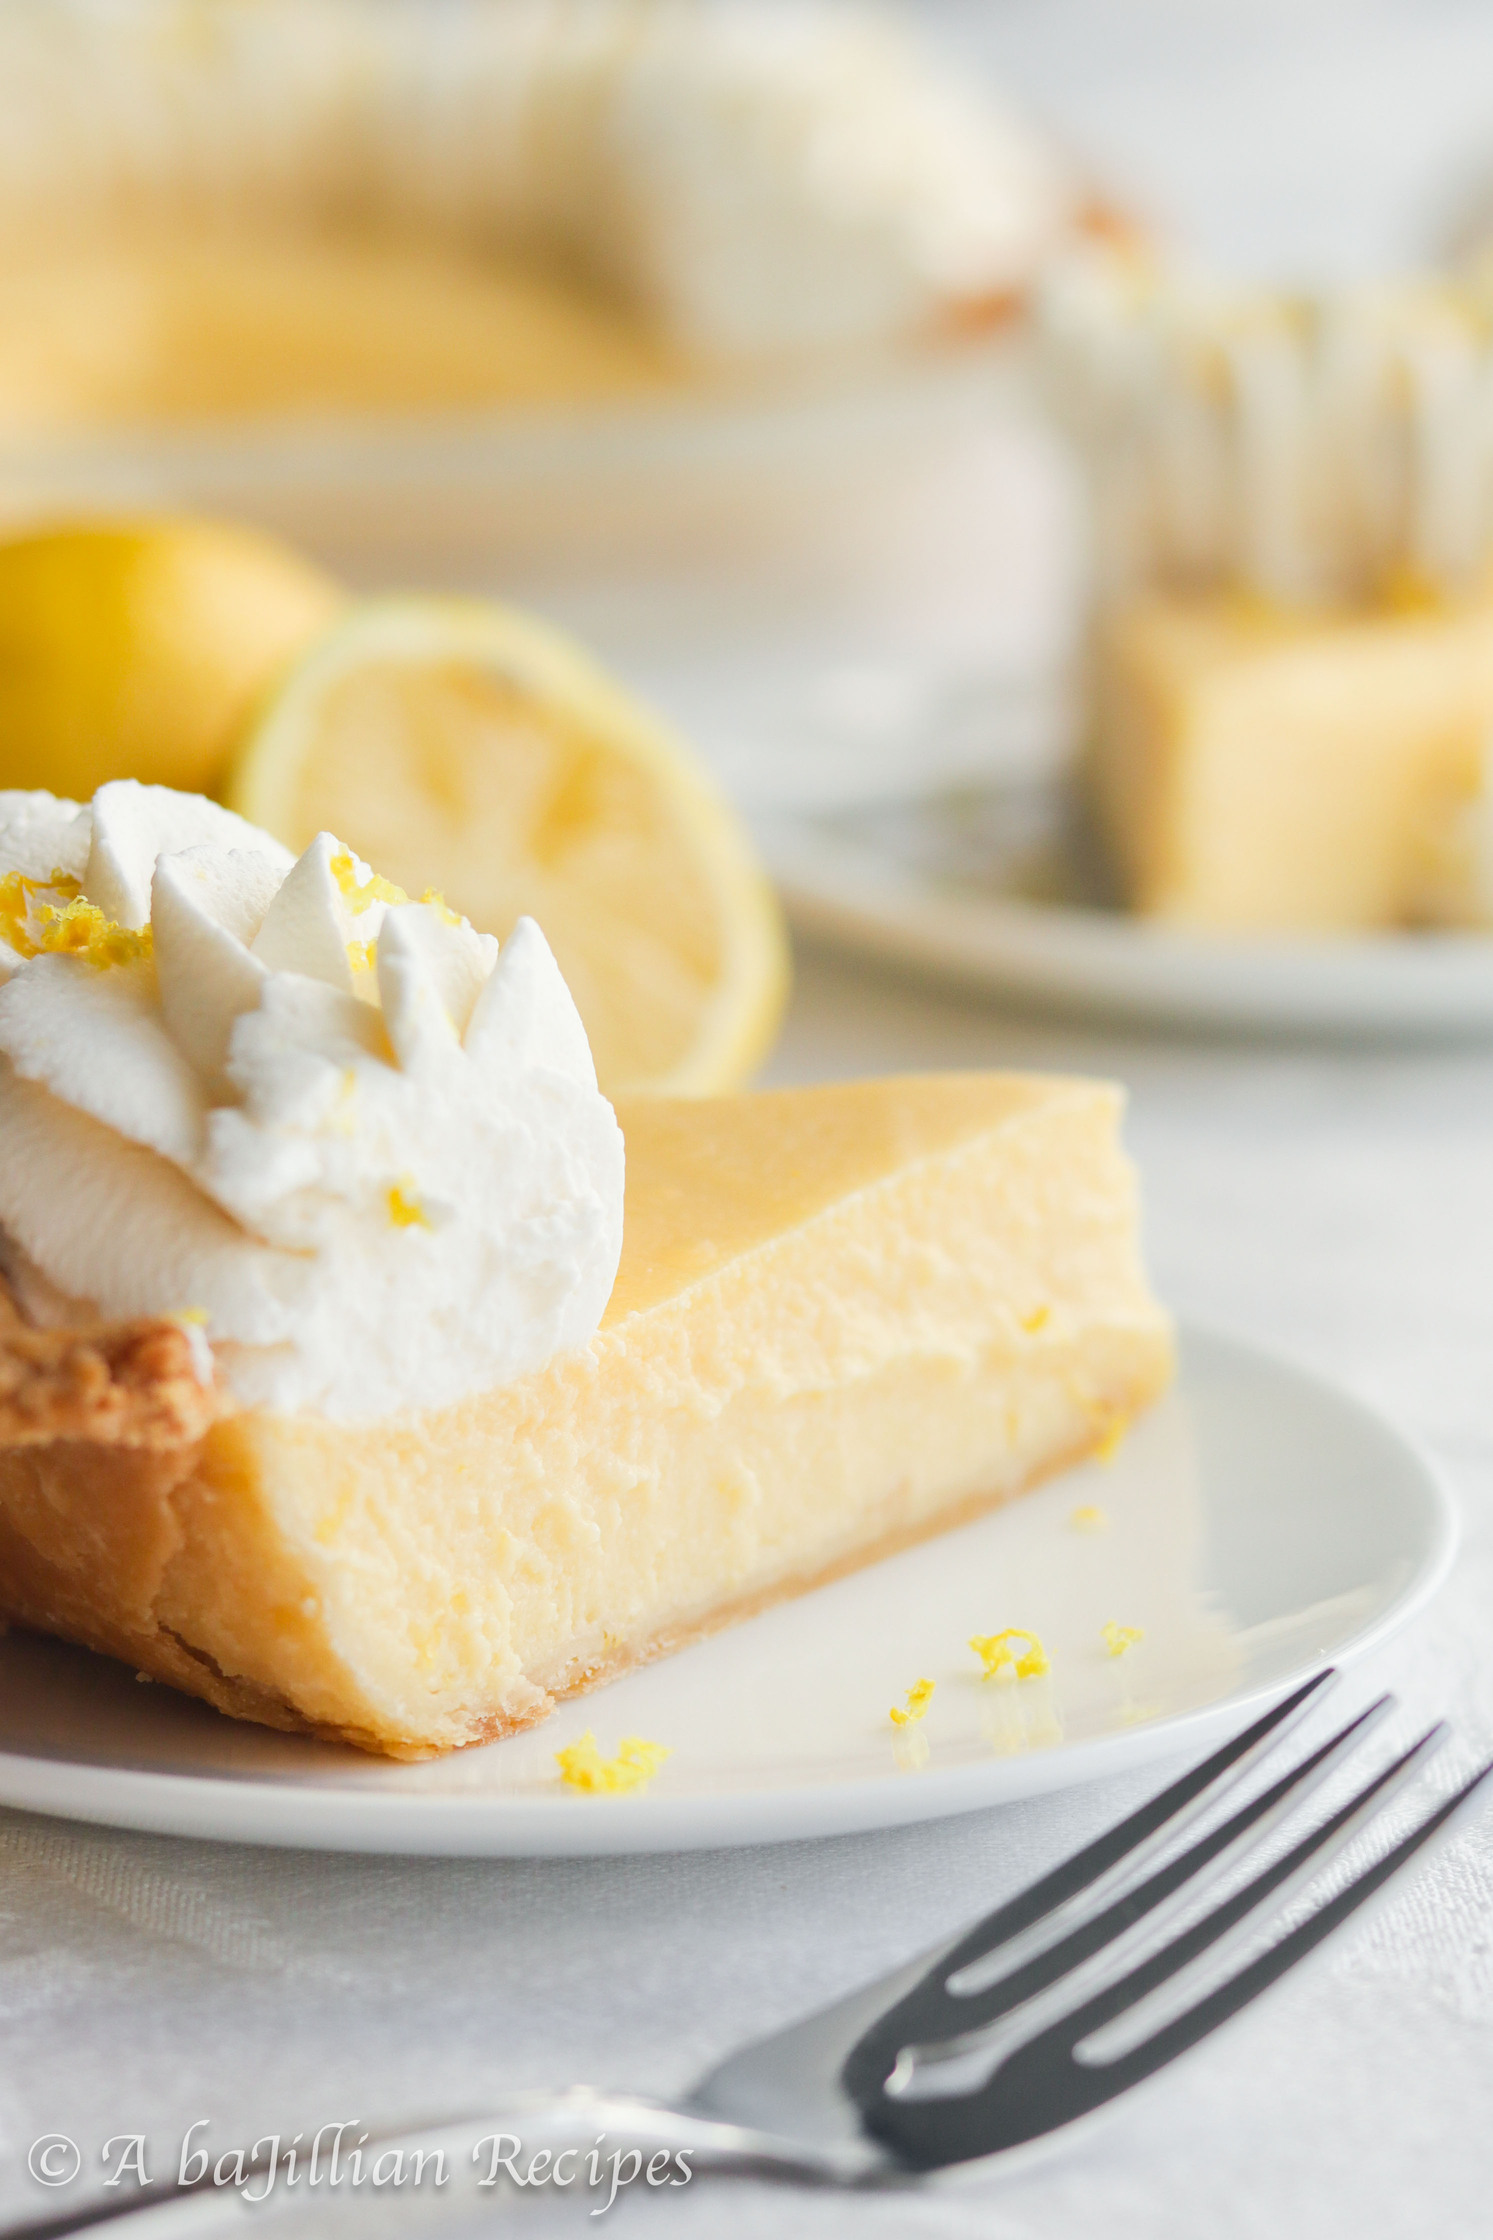
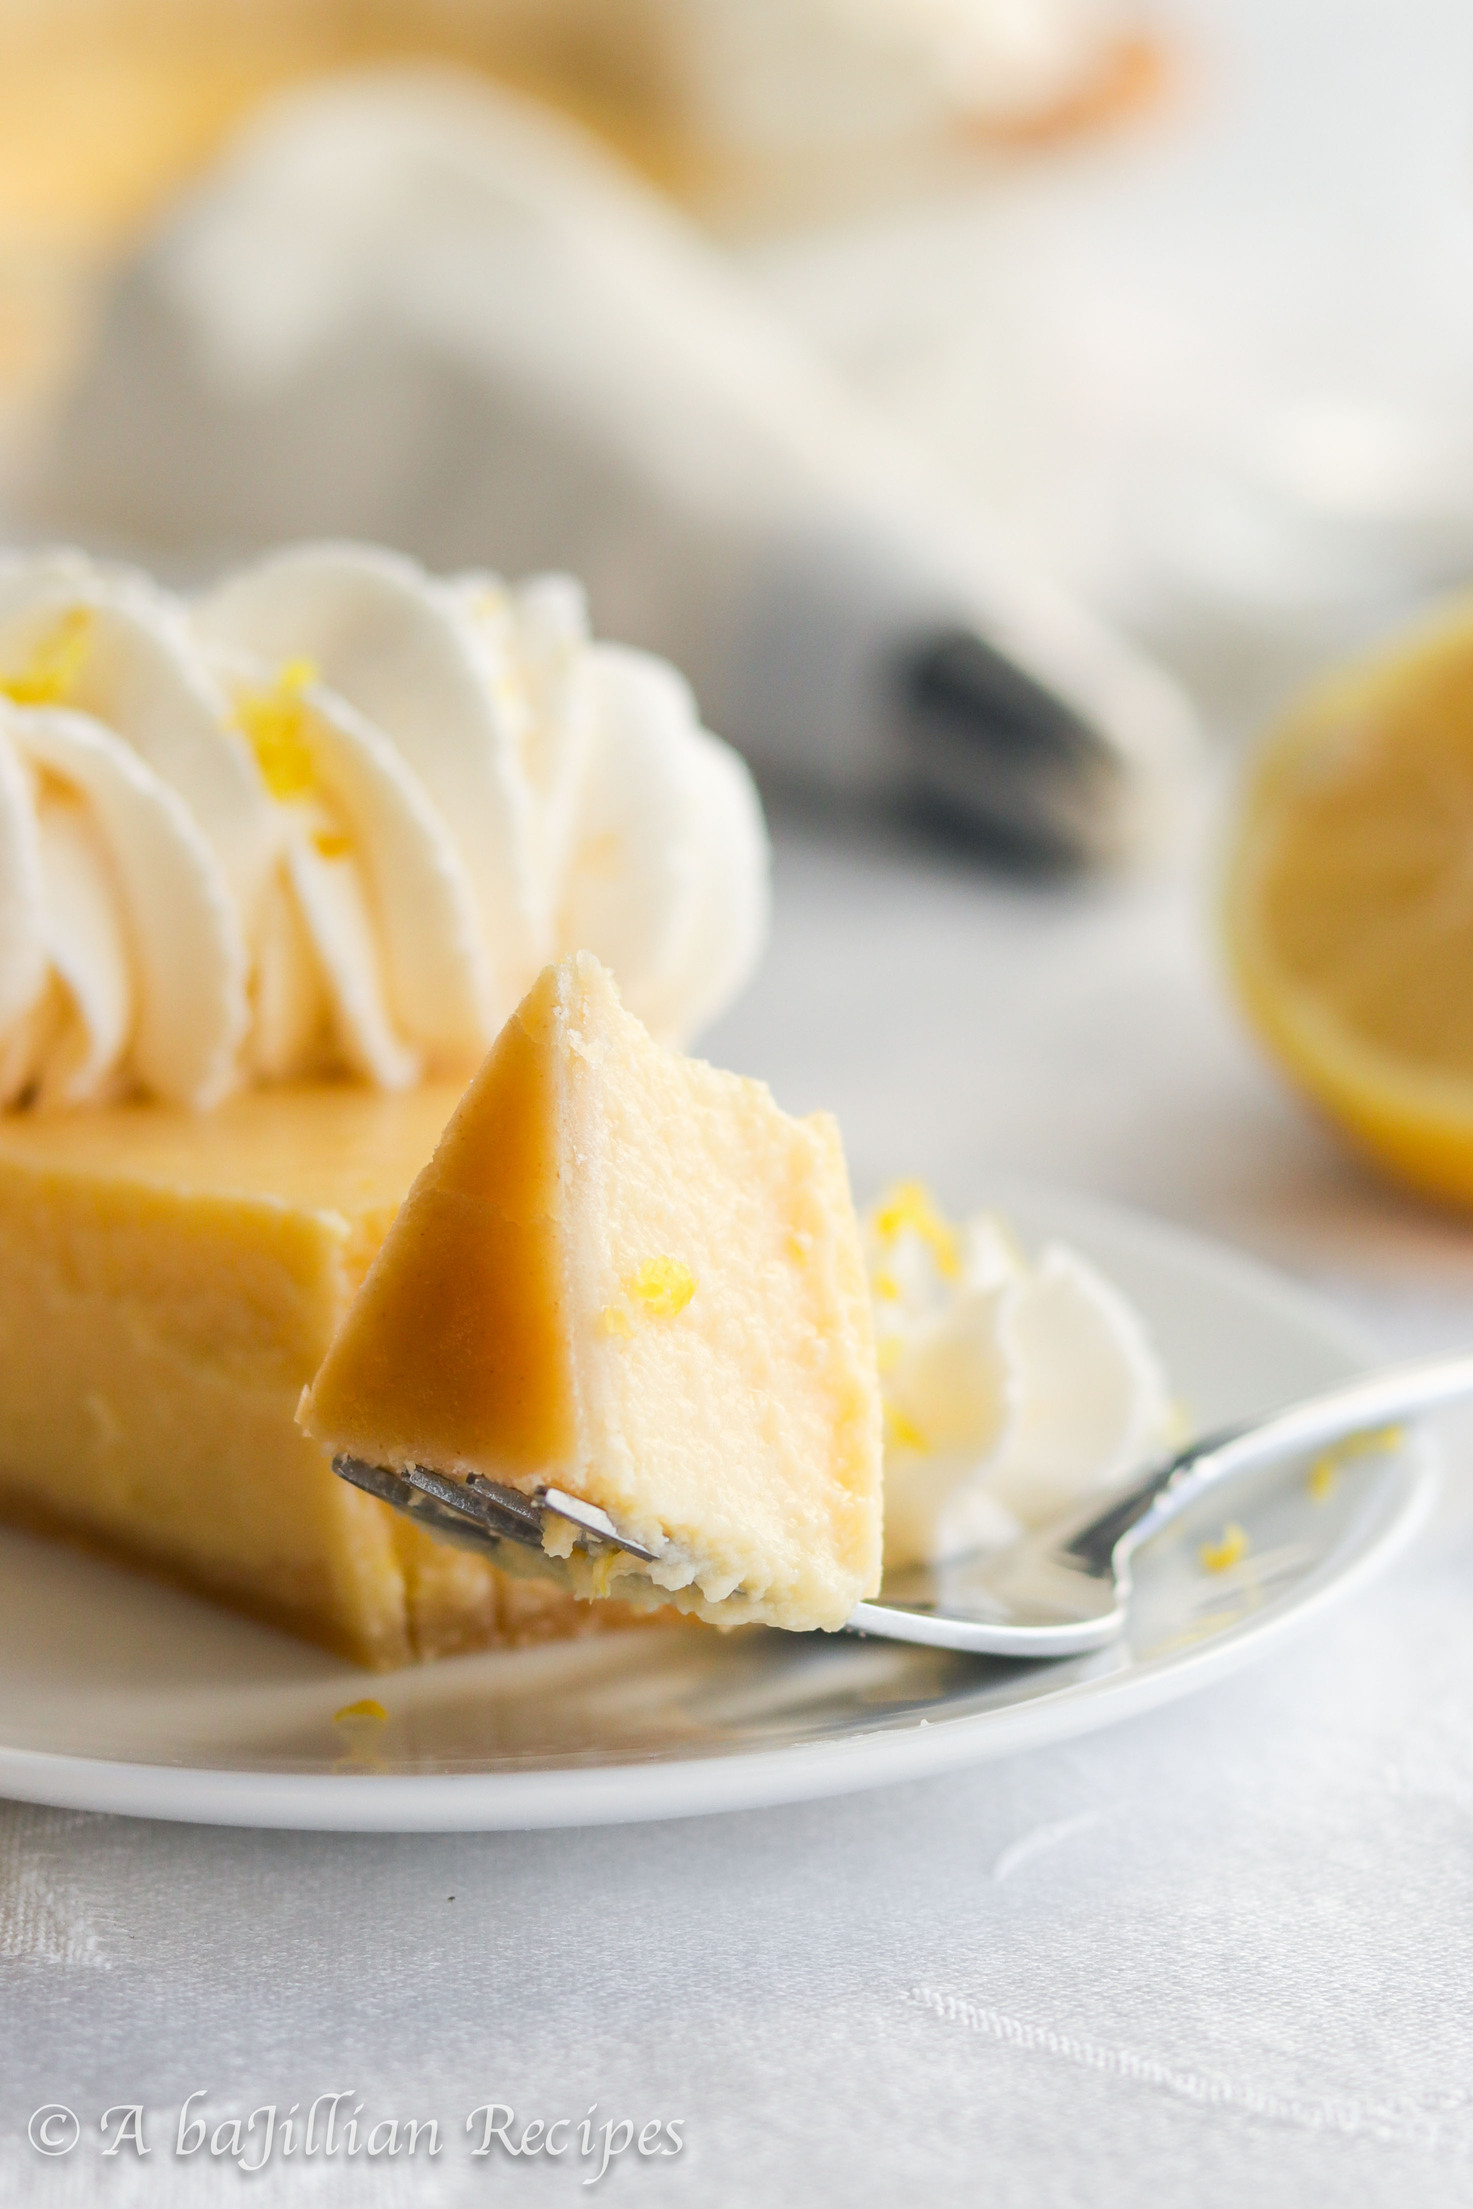
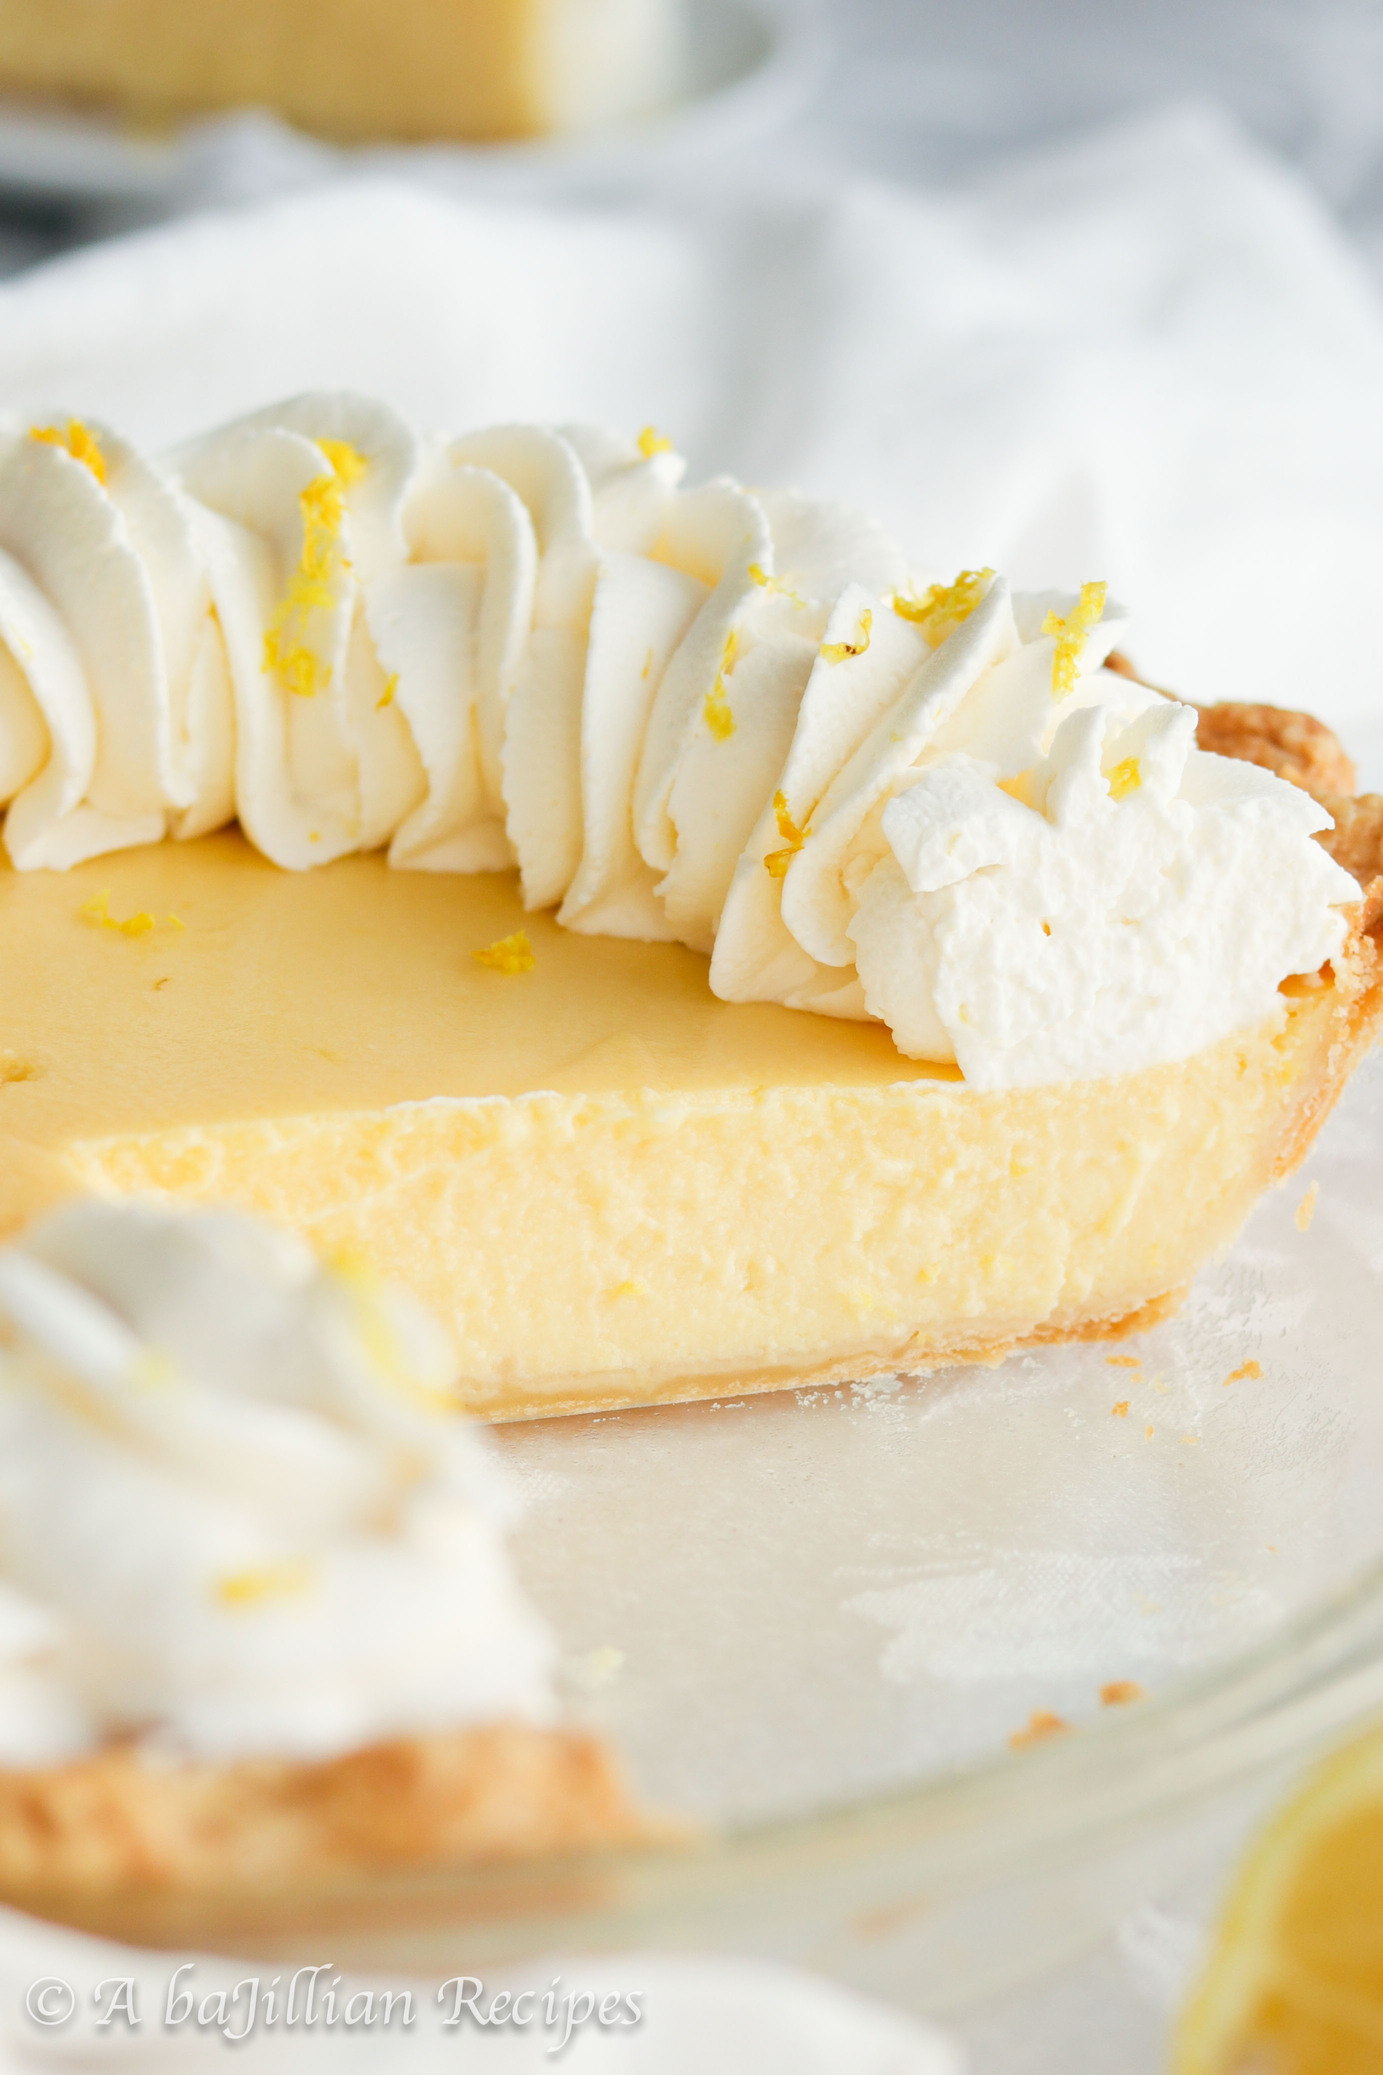
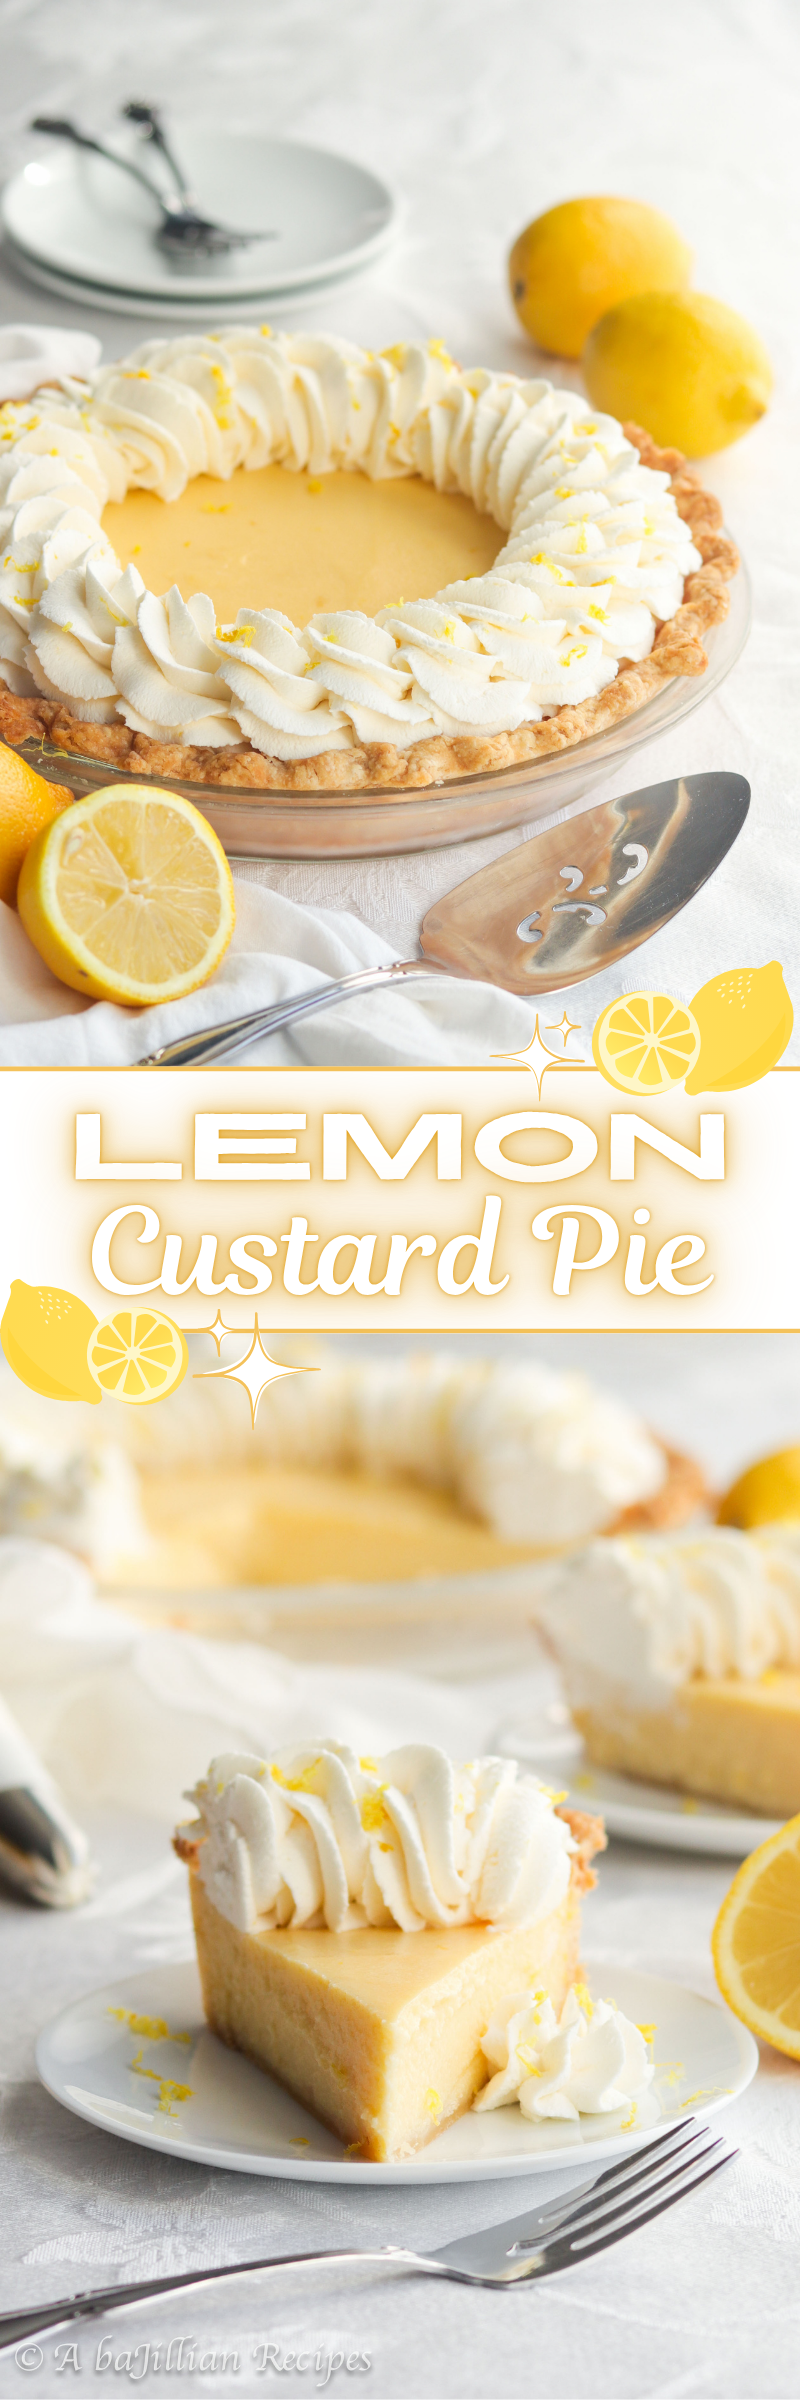
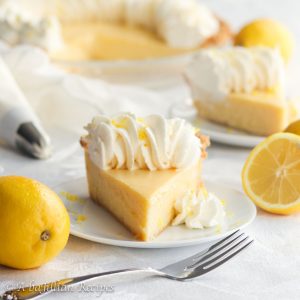
Smooth and creamy lemon filling nestled in a golden flaky pastry crust and crowned with a fluffy border of lemon-kissed whipped cream.
Today’s recipe is brought to you by Costco.
Well, sort of…
I was shopping at Costco recently and as I was perusing their bakery, I came across a lemon custard pie. It looked absolutely delicious, and I was THIS close to placing it into my shopping cart. Unfortunately for my tastebuds, I decided against it since the pie was so big, and there was no way I could eat it all on my own. I also had no upcoming gathering that would allow me to share it with others, so I left Costco sad and pie-less.
Thankfully, this short and probably unnecessary story has a happy ending. In the end, I got my lemon custard pie. And I’m pretty confident THIS pie is WAY better than Costco’s…
Why You’ll LOVE This Lemon Custard Pie
Golden Flaky Crust: The pie crust is perfectly golden, flaky, and buttery. That’s because I’ve got a few tried-and-true tips that prevent the crust from turning soggy for guaranteed flakiness!
Creamy Lemon Filling: With just the right amount of citrus tang and vanilla sweetness, this lemon custard filling is irresistible. It’s lusciously smooth and creamy, and it slices like a hot knife through butter.
Made with Simple Ingredients: Odds are you probably already have most, if not all of the ingredients in your pantry. Made with staples like milk, eggs, sugar, and butter, this Lemon Custard Pie is quite simple to make.
Tips For a Perfectly Crisp Crust
Par-Bake the Crust: Although many custard pie recipes involve baking the filling in a raw crust, this often results in a crust that doesn’t bake all the way through. That’s because the filling takes less time to bake than the crust. In order to avoid this, par-baking/blind-baking is key. It might be a few extra steps, but it’s worth it for that nice golden, flakey crust. The instructions for par-baking are included in the recipe below, but if you’d like photo instructions, check out my White Chocolate Blueberry Cream Pie recipe.
Prevent Soggy Crusts: Custard pies have the tendency to get soggy crusts due to the amount of moisture in the filling. To prevent this, all you have to do is brush some egg white evenly on the bottom and up the sides of the crust. I usually do this during the last 5 minutes of par-baking. The egg white creates a shiny, leak-proof barrier that results in a firm and crisp crust.
Tips For Luscious Lemon Custard
Use Freshly-Squeezed Lemon Juice: It probably goes without saying, but freshly-squeezed lemon juice offers a brighter and more aromatic flavor than any bottled lemon juice. The bottled stuff often contains weird additives and imparts a harsher, artificial, and sometimes metallic taste.
Don’t Over-Whisk: Whisking the filling too much incorporates too much air, preventing a smooth and creamy texture. I would definitely avoid using an electric beater and instead whisking by hand. While you do need to whisk constantly and quickly during the tempering stage (incorporating hot milk into egg mixture), try your best not to be too vigorous.
Add Cornstarch: While it’s not traditionally added to custard pie filling, cornstarch provides more structural stability, allowing for cleaner slices and preventing the filling from becoming runny. It stabilizes the egg proteins, preventing them from overcooking or curdling as the pie bakes in the oven.
ALWAYS Strain the Filling: No matter how smooth your filling looks, it’s essential to strain it before pouring it into the crust. This eliminates any cooked bits of egg or random lumps that might’ve formed, ensuring a smooth and creamy texture. For best results, use a fine-mesh sieve and lightly stir the filling as it strains through the sieve. Try not to press on the lumpy bits as you don’t want those to incorporate back into the filling.
Bake Low and Slow: Since this is a very egg-based filling, baking the pie low and slow is the best way to avoid curdling the eggs, while also creating a smooth and silky texture. The pie bakes at 325ºF for about 35-45 minutes, or until the edges are firm and puffed, and the center jiggles uniformly when you give the pie plate a gentle shake. I’ve found that oven times can vary when it comes to custard pies, so the best thing to do is to keep an eye on your pie. After it’s baked for 20 minutes, make sure to check it AT LEAST every 5 minutes.
One More Tip Worth Mentioning
Add Lemon Juice Last: When you’re making the lemon whipped cream, it’s important to incorporate the lemon juice last. If you add the lemon juice too soon, it’ll cause the cream to curdle. Once the cream has been whipped to soft peaks, you’re safe adding the lemon juice. However, I prefer to stir it in at the very end just to make sure.
Lemon Custard Pie
Ingredients
Crust:
- 3 Tablespoons water
- 1 Tablespoon sour cream
- 1 ¼ cups all-purpose flour
- 1 Tablespoon granulated sugar
- ½ teaspoon salt
- 4 Tablespoons shortening, cut into 1/2-inch pieces
- 4 Tablespoons unsalted butter, cold
- 1 egg white, for brushing the crust
Lemon Custard Filling:
- ¾ cup granulated sugar
- 2 ½ Tablespoons cornstarch
- ¼ teaspoon salt
- 5 large eggs
- 1 large egg yolk
- ⅓ cup freshly-squeezed lemon juice
- 1 ½ cups milk
- ½ cup heavy cream
- 1 Tablespoon lemon zest
- 1 teaspoon vanilla
Lemon Whipped Cream:
- 1 cup heavy cream
- ⅓ cup powdered sugar
- 1 teaspoon lemon zest
- 1 teaspoon vanilla
- 1 Tablespoon lemon juice
Instructions
Make the Crust:
- In a small bowl, combine the water and sour cream; set aside.
- In a large mixing bowl, stir the flour, sugar and salt together. Scatter the shortening over the flour, then use a cheese grater to grate the butter on top. Using a fork or a pastry blender, cut the mixture together until it resembles coarse crumbs. Add the sour cream mixture and use a stiff rubber spatula to stir and press the dough together until it forms one big mound. If dough is still too dry and doesn’t hold together, add another tablespoon of water.
- Turn the dough onto a piece of plastic wrap and flatten into a 5-inch disk. Wrap tightly and refrigerate for at least one hour.
- Once chilled, roll the dough out into a 12-inch circle and fit into a greased 9-inch pie plate. Trim, fold, and crimp the edge of the dough. Cover with plastic wrap and place in the freezer for 15 minutes until chilled and firm.
- Preheat the oven to 375ºF. To blind-bake, I like to press a sheet of aluminum foil into the pie pan since it gets into the crevices better than parchment paper. I then pour pie weights (or dried beans or rice) on top of the foil. Place pie plate onto a baking sheet and bake until the edges of the crust are starting to brown, about 15-16 minutes.
- Remove pie from the oven and carefully lift the aluminum foil (with the dried beans or rice) out of the pie. Return the pie crust to the oven and bake 5 more minutes. Remove from oven and brush egg white evenly over crust. Return to oven and bake until golden brown, about 4-5 minutes longer. Remove and reduce oven temperature to 325ºF.
Make the Filling:
- In a large bowl whisk the sugar, cornstarch, and salt together. Add the eggs and egg yolk, whisking until just combined. Whisk in the lemon juice.
- Pour the milk and heavy cream into a large saucepan. Heat on the stove over medium heat until you begin to see tiny bubbles along the edges of the pan. Remove from heat.
- Temper the egg mixture by slowly pouring a cup of the warmed milk into the egg mixture while whisking constantly. Slowly pour the rest of the warmed milk into the egg mixture, and continue whisking.
- Pour the mixture back into the saucepan, and continue cooking for 2-3 minutes, or until mixture thickens and reaches an internal temperature of 170ºF - 180ºF. Pour mixture through a fine mesh sieve to strain out any cooked egg bits. Stir in the lemon zest and vanilla.
- Pour the filling into the baked crust, and bake for 35-45 minutes, or until edges look puffed and center jiggles when you gently shake the pie plate. It should have an internal temperature of 175ºF - 180ºF.
- Allow pie to cool on a cooling rack. Once it reaches room temperature, chill pie in the refrigerator for at least 4 hours to allow it to firm and set up.
Make the Whipped Cream:
- In the chilled bowl of a stand mixer fitted with the whisk attachment, beat the heavy cream until soft peaks form. Add the powdered sugar, zest, and vanilla, and continue beating until stiff peaks form. Stir in the lemon juice. Transfer whipped cream to a pastry bag fitted with a large star tip and pipe along the border of the pie. Slice, serve, and enjoy!